With the meteoric rise of cyberattacks, teleworking, and the transfer of servers to cloud providers, it’s becoming increasingly difficult to secure access to data and resources required by users. A Zero Trust security model has several distinct advantages and is relatively straightforward to implement.
What Are the Principles of Zero Trust?
Here are the three fundamental principles governing the Zero Trust model:
1. Grant as few privileges as possible
By granting as few privileges and accesses as possible without affecting a person’s ability to perform their tasks, you grant access to resources only on a case-by-case basis—only providing access to what is necessary and nothing else.
2. Never trust, always verify
No action or user is intrinsically reliable in a Zero Trust security model. Every new entry into a system or request for access to new data must be accompanied by some form of authentication to verify the user’s identity.
3. Always keep an eye on things
The Zero Trust model requires consistent monitoring and evaluation of user behavior, data movements, network changes, and data modifications. Although authentication and privilege restrictions are the backbone of the model, it’s always best to verify all actions performed within your organization’s infrastructure.
Is Zero Trust Accessible to all Types of Business?
There are a number of solutions on the market that address the Zero Trust approach, some more expensive than others. We’re going to focus on a solution that’s accessible to everyone, regardless of the size of your business.
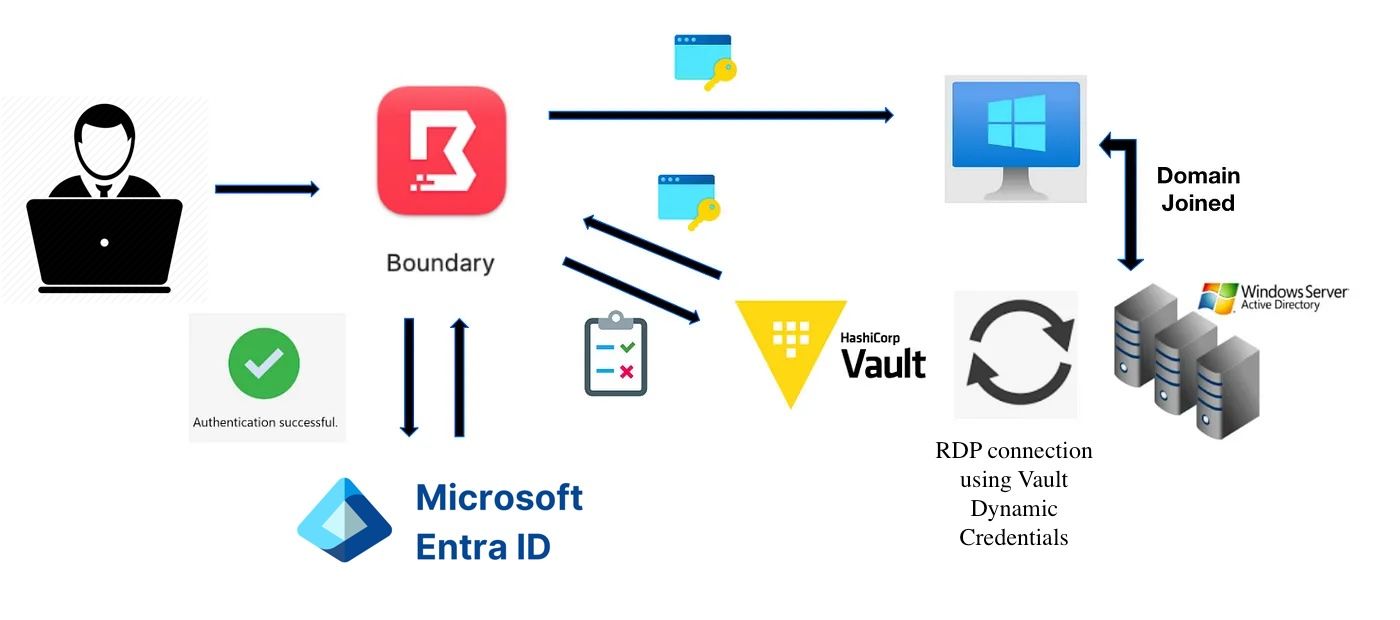
Here’s a graphic that explains the solution that will be deployed:
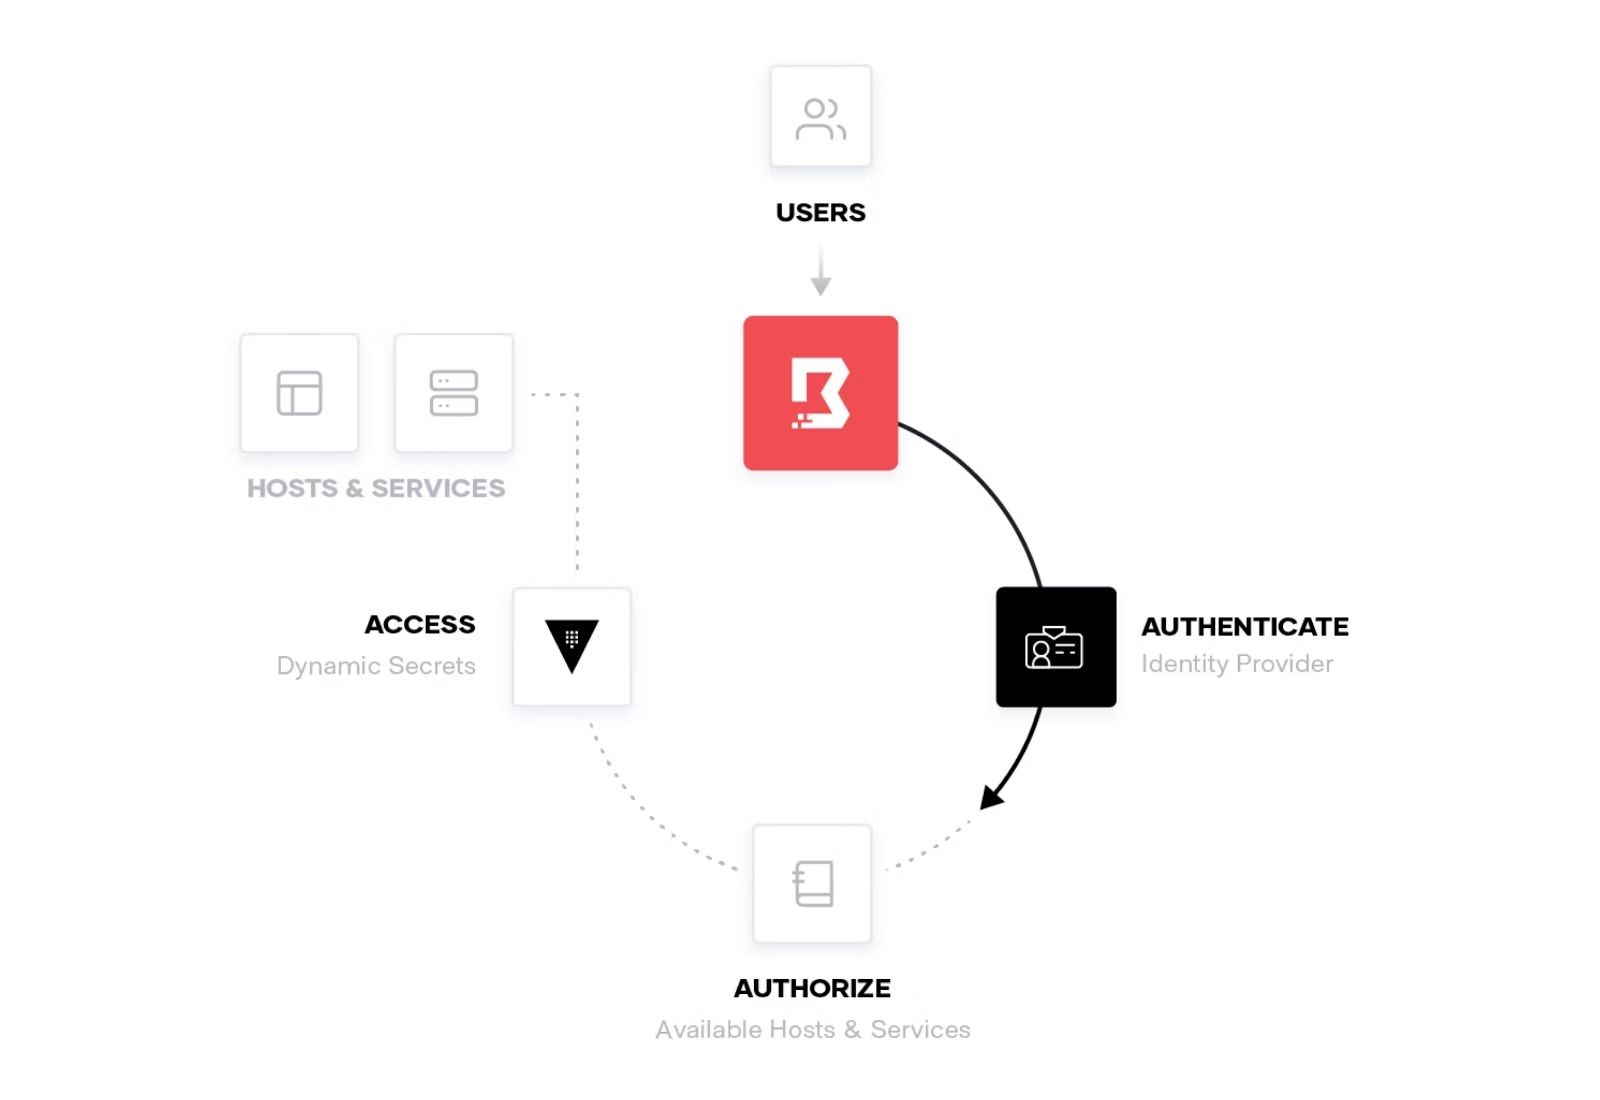
By combining three products that offer free or very low-cost versions, we’ll be able to implement a Zero Trust solution.
HashiCorp Vault
HashiCorp Vault enables companies to centrally store, access, and distribute dynamic secrets such as tokens, passwords, certificates and encryption keys in any public or private cloud environment. Unlike cumbersome ITIL-based systems, HashiCorp solutions deliver credentials to people and machines dynamically, creating a secure, efficient, and truly multi-cloud solution for today’s increasingly uncertain world.
HashiCorp Boundary
Traditional solutions for securing user access typically required you to distribute and manage SSH keys, VPN credentials, and bastion hosts, creating risks of proliferation of user credentials and access to entire networks and systems. HashiCorp Boundary secures access to critical applications and systems with detailed permissions that don’t require you to manage credentials or expose your entire network.
Microsoft Entra ID (also known as Microsoft Azure Active Directory)
The majority of companies now use cloud solutions to manage their email, calendars, documents, and more. To ensure multi-factor authentication to the Zero Trust solution, we’re going to use Microsoft Entra ID combined with Microsoft Authenticator installed on employees’ cell phones to validate that the user’s device is actually in their possession. It would also be possible to use another provider such as Okta, Google, AWS, etc.
What Do I Need to Set Up to Deploy the Solution?
- Have an identity provider to authenticate users (Microsoft in this case)
- Deploy a Boundary server and a Vault server
- Deploy Boundary workers in each internal network we need to connect to
- Deploy Boundary Desktop on user workstations
HashiCorp offers a cloud version of Boundary and Vault. It would therefore be possible to use this version instead of having to deploy an instance, but for the purposes of this article we’ll be using the free open-source versions of their products.
Deployment Example
In order to demonstrate the Zero Trust approach in a mixed environment, we will deploy the following elements:
- A main server to be deployed at AWS using an EC2 m6i.large instance running Ubuntu 24.04 Server LTS, on which we’ll install Boundary Controller, Worker, and Vault
- A t3a.medium instance running Ubuntu 24.04 Server LTS at AWS, on which we’ll configure vault-ssh-helper to test SSH connection with a one-time password
- A virtual machine running Ubuntu 24.04 Server LTS on a physical Windows Server 2019 server using the Hyper-V role, on which we’ll install Boundary Worker
- A Windows Server 2019 virtual machine on a Windows Server 2019 physical server using the Hyper-V role, which will be used to test the use of a dynamic Active Directory account for the RDP connection
The steps for setting up the environment are available here.
Objectives
1. Demonstrate an SSH Connection Using Vault OTP

2. Demonstrate an RDP Connection Using Vault Dynamic Credentials
Environment Configuration
Please refer to this procedure to configure Boundary and Vault before proceeding.
Using Vault OTP with Boundary Desktop
Here we’ll assume that you’ve already deployed the above environment, including vault-ssh-helper on your instance, and Boundary Desktop installed on your workstation.
1. Log on to your Boundary server via the web interface and authenticate yourself with an account that has administrator rights.
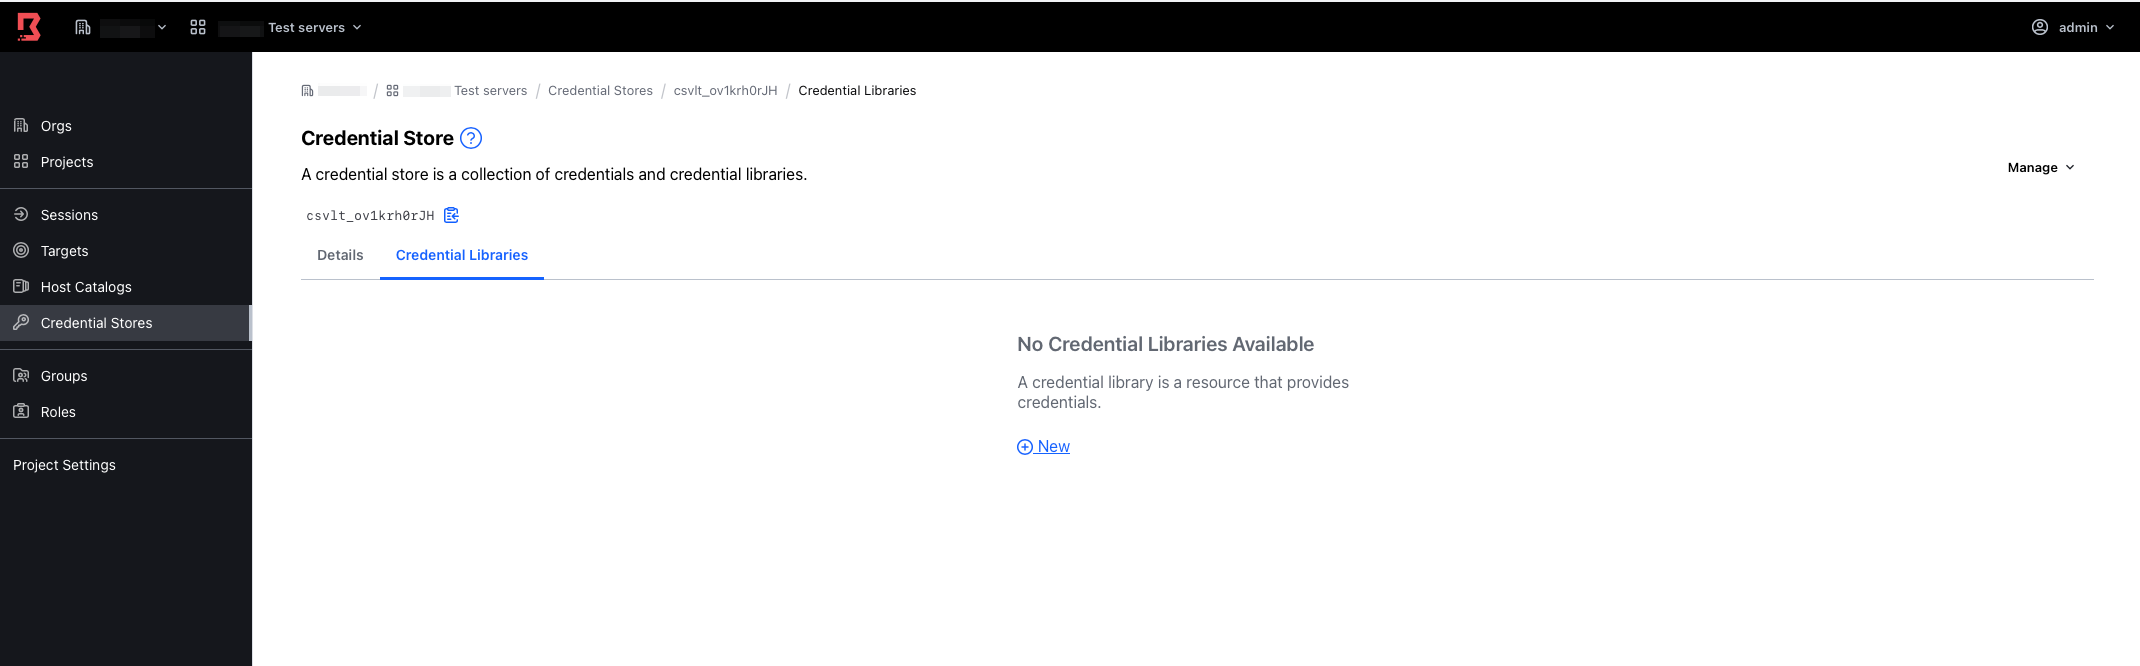
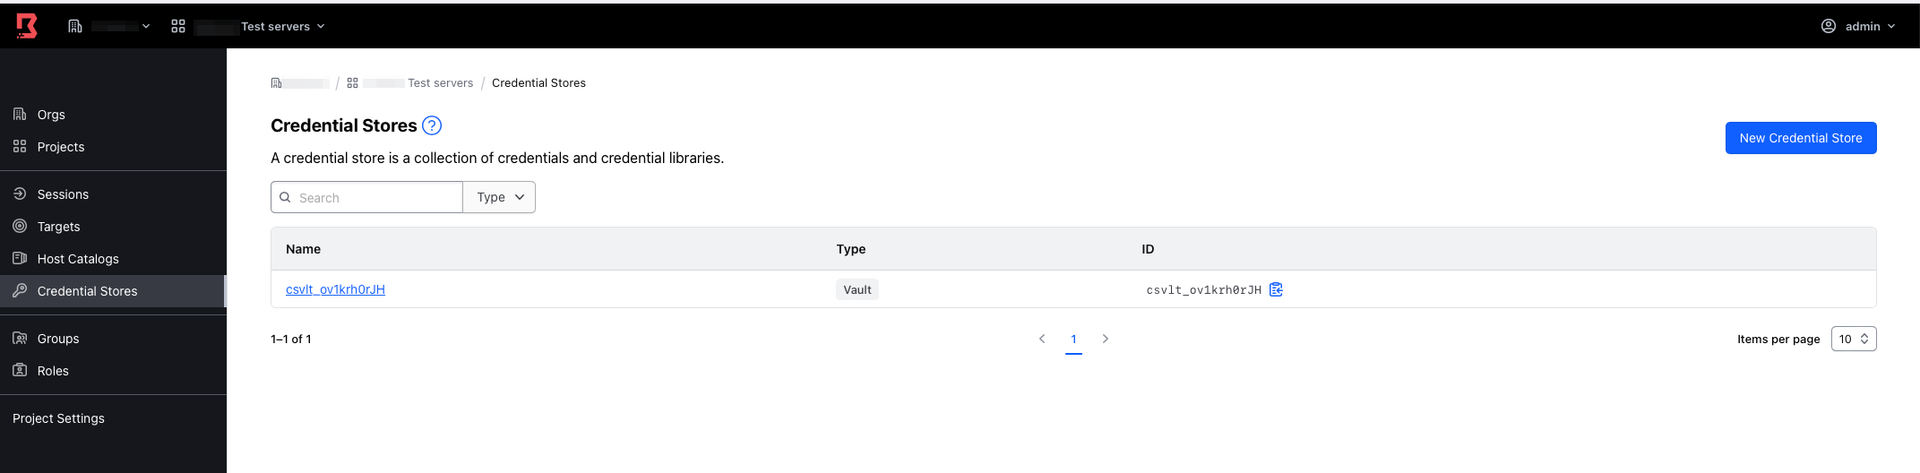
2. Select your organization, your project and go to the “Credential Stores” section, which should already have a Vault library.

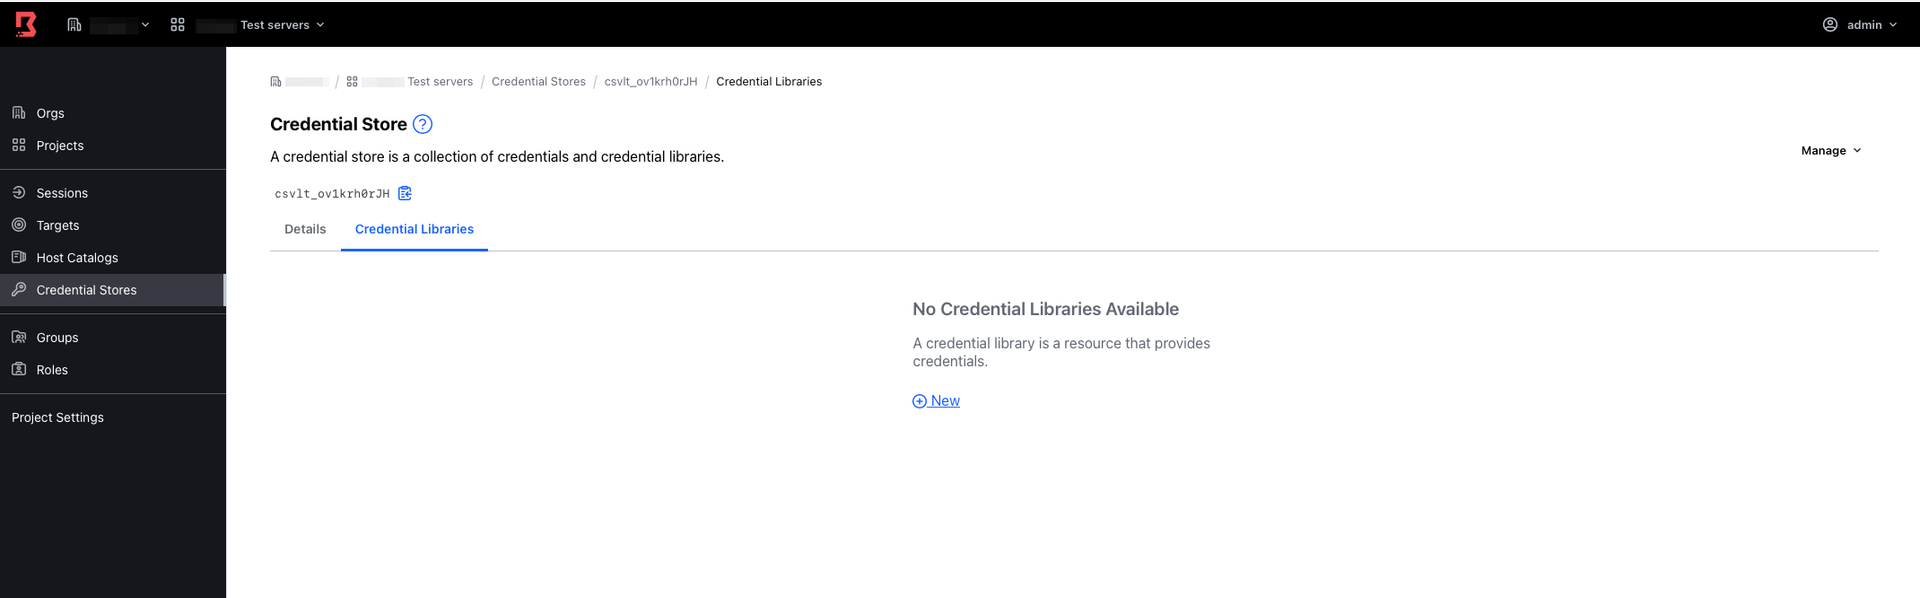
3. Click on your Vault library and go to the “Credential Libraries” section.
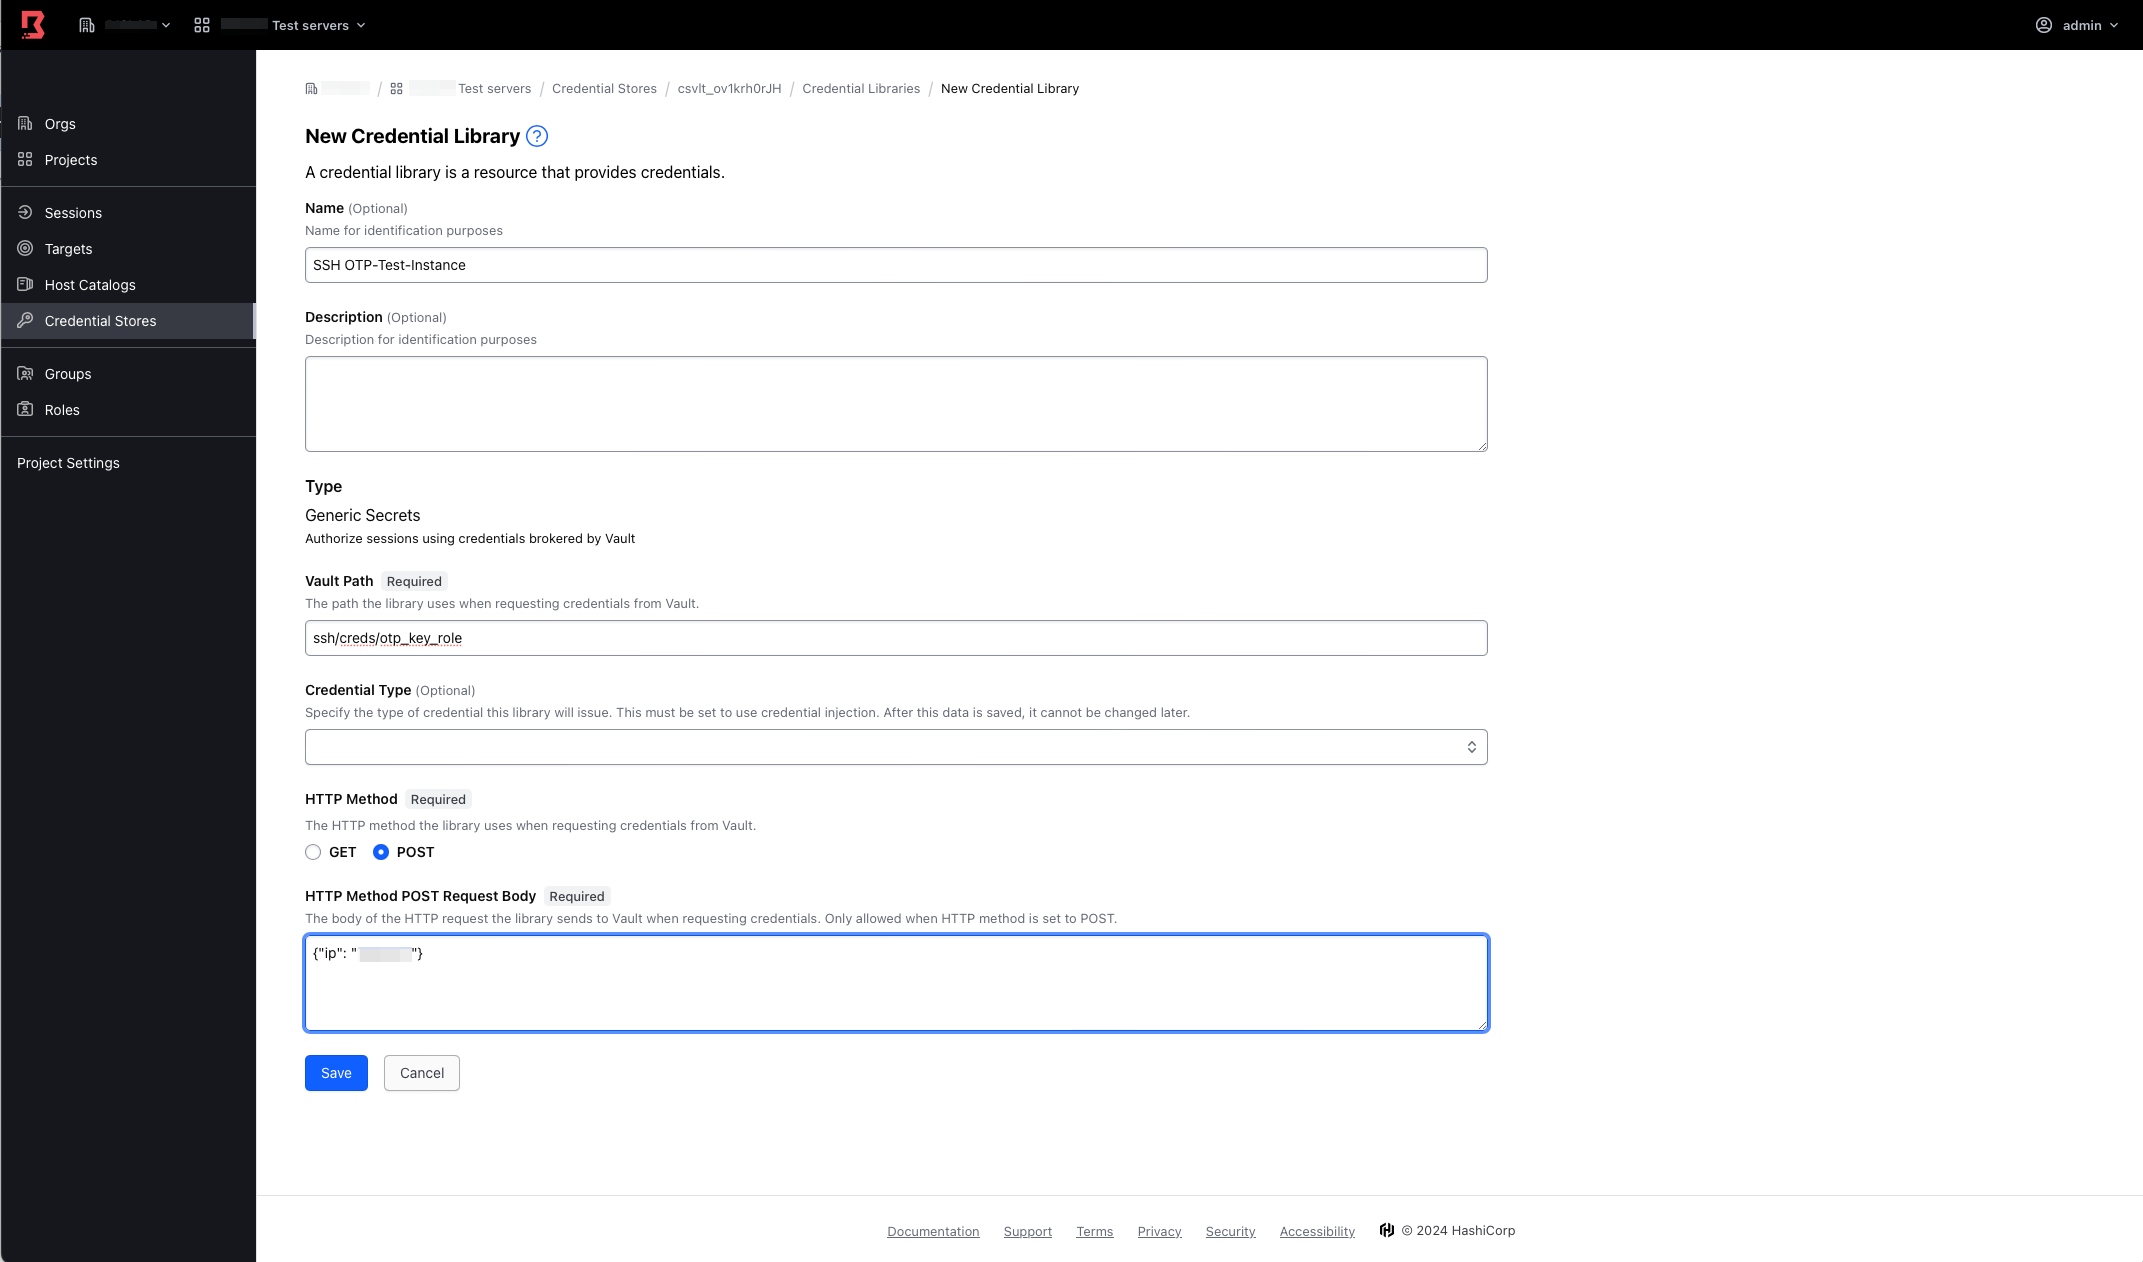
4. Click on New, then enter a name for your instance in the Name section.
5. In the Vault path section, enter the following value:
ssh/creds/otp_key_role6. Change the HTTP Method section from GET to POST and enter the internal IPv4 address of your instance as follows:
{"ip": "X.X.X.X"}7. You should obtain something similar to the screenshot below. If so, press the Save button.
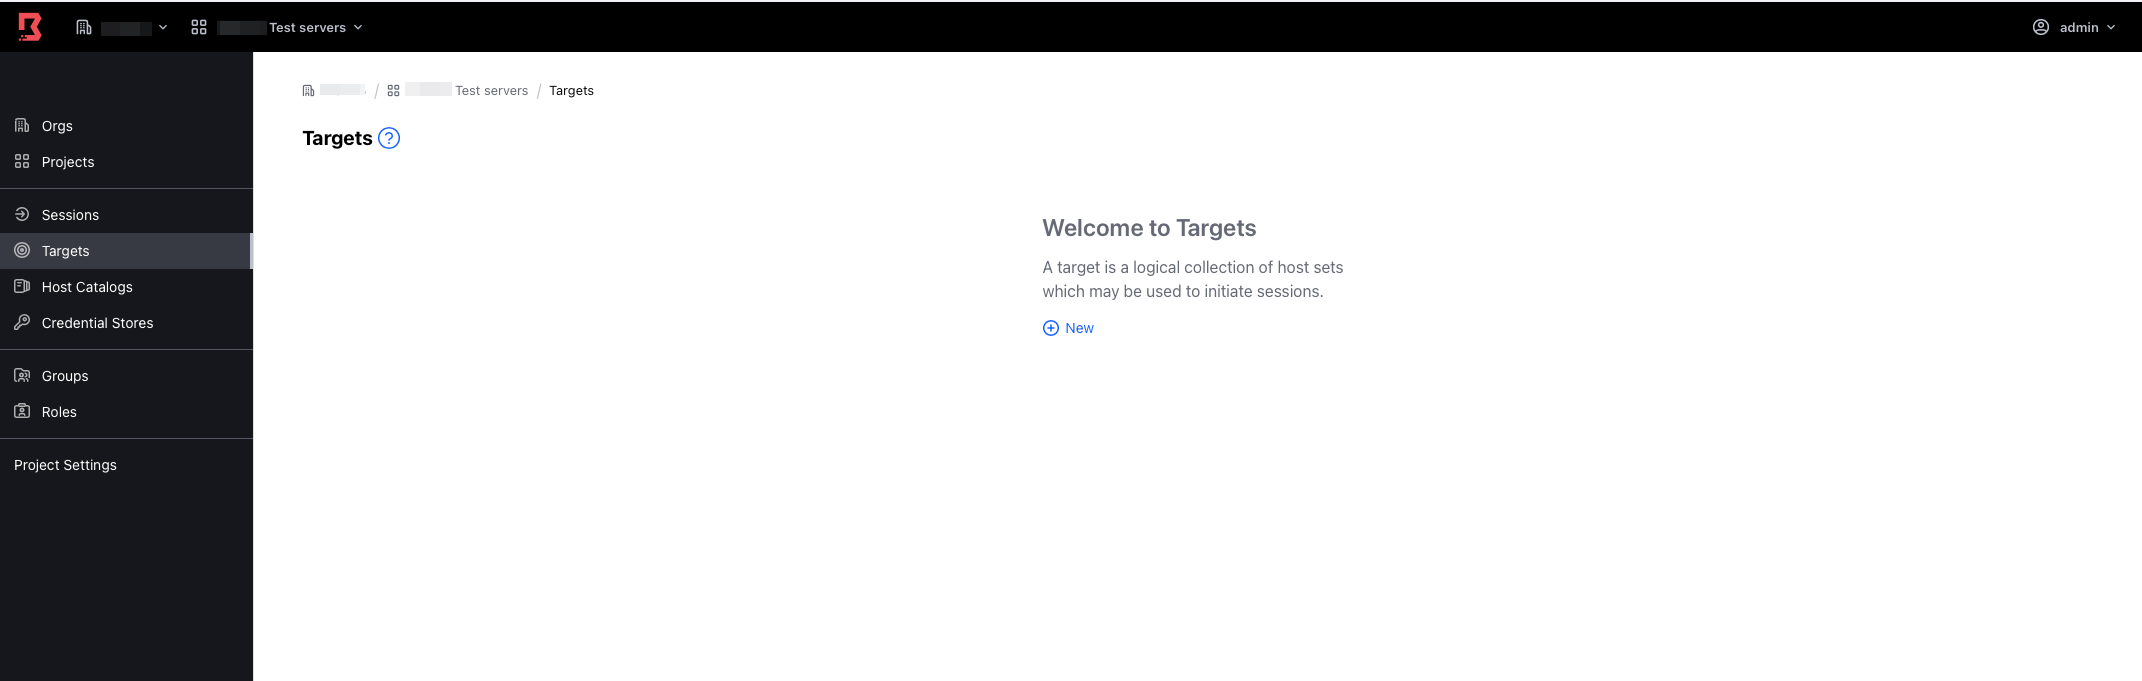
8. Now go to the Targets section on the left and press New.
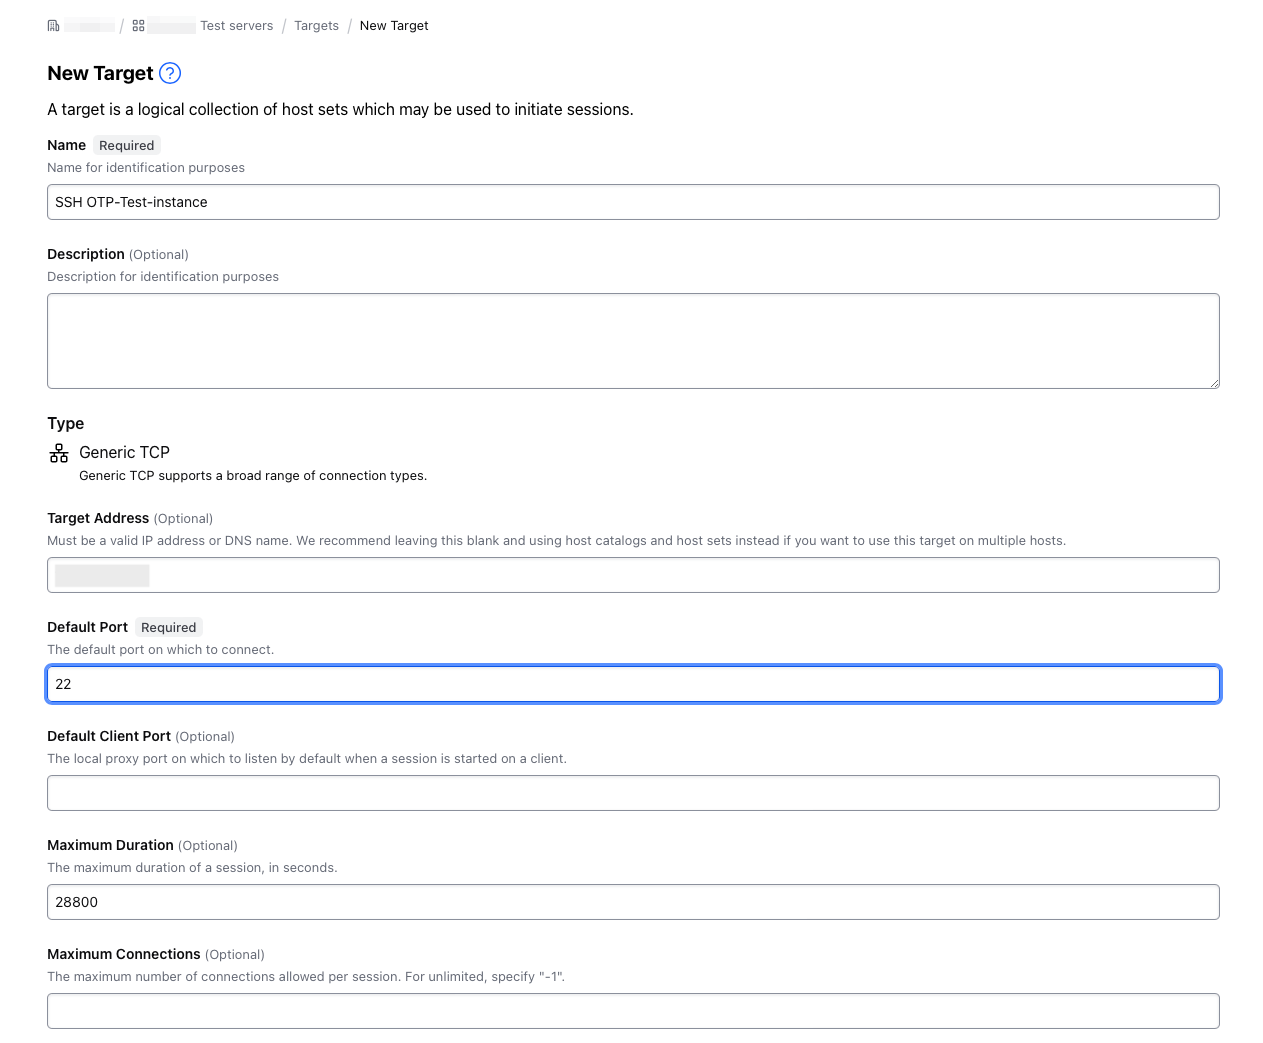
9. Enter the name you want to be displayed in Boundary Desktop to determine which service type and instance we’re going to connect to. In this case, as we want to test an SSH connection, it’s best to specify.
10. Enter the internal IPv4 address of your instance in the Target Address section, and port 22 in the Default Port section. Note that in the HashiCorp cloud version, instead of Generic TCP, SSH is available as the protocol type, but in the self-hosted version, only Generic TCP is available, regardless of the connection protocol used.
11. Before going to the Workers section, validate the information, which should look like this:
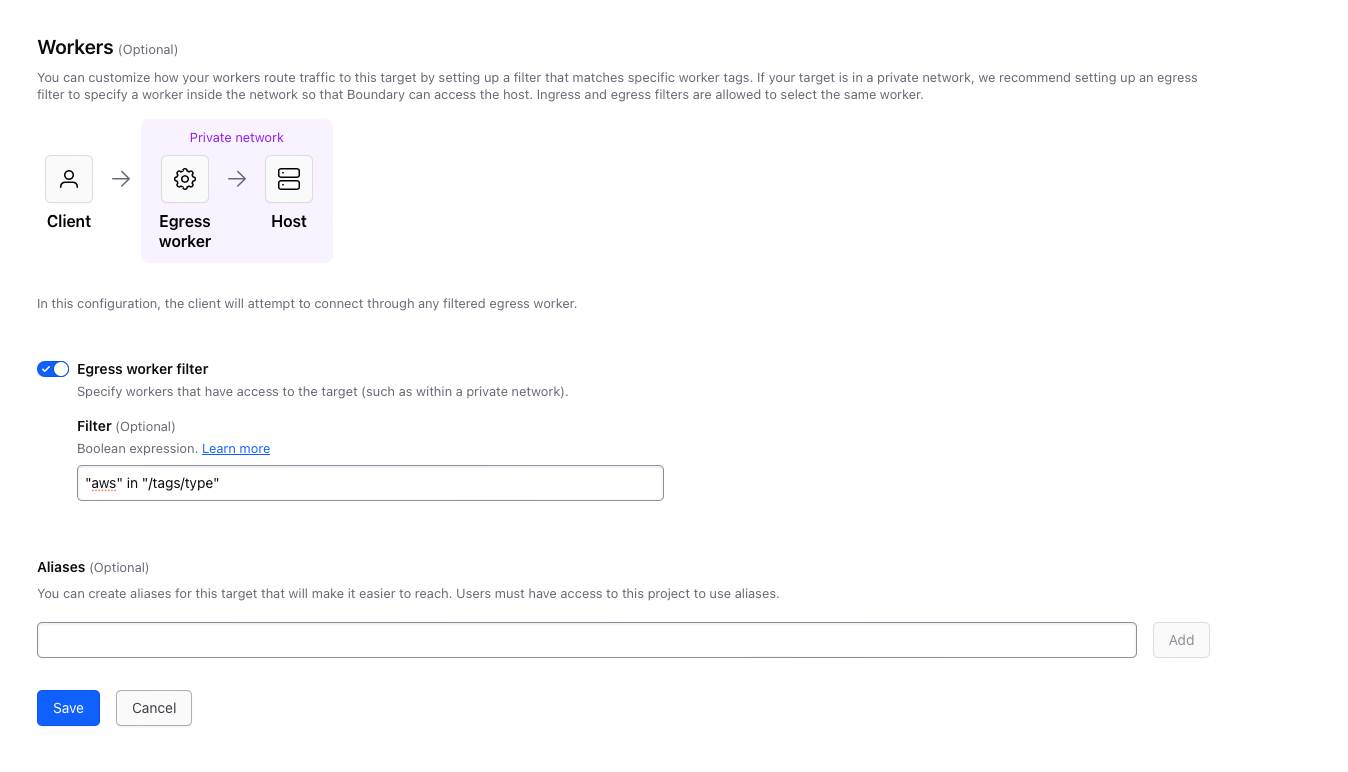
12. If you have several workers connected to your Boundary server, you need to activate the Egress worker filter section and enter information related to the tags you’ve defined in your Workers configuration file. In this case, as my instance is on the AWS side, I’ll specify this in the Filter section, but if your instance was elsewhere or if you had several workers in different AWS regions, you could use another type of tag:
"aws" in "/tags/type"13. You should have something similar to the image below. If so, save it.
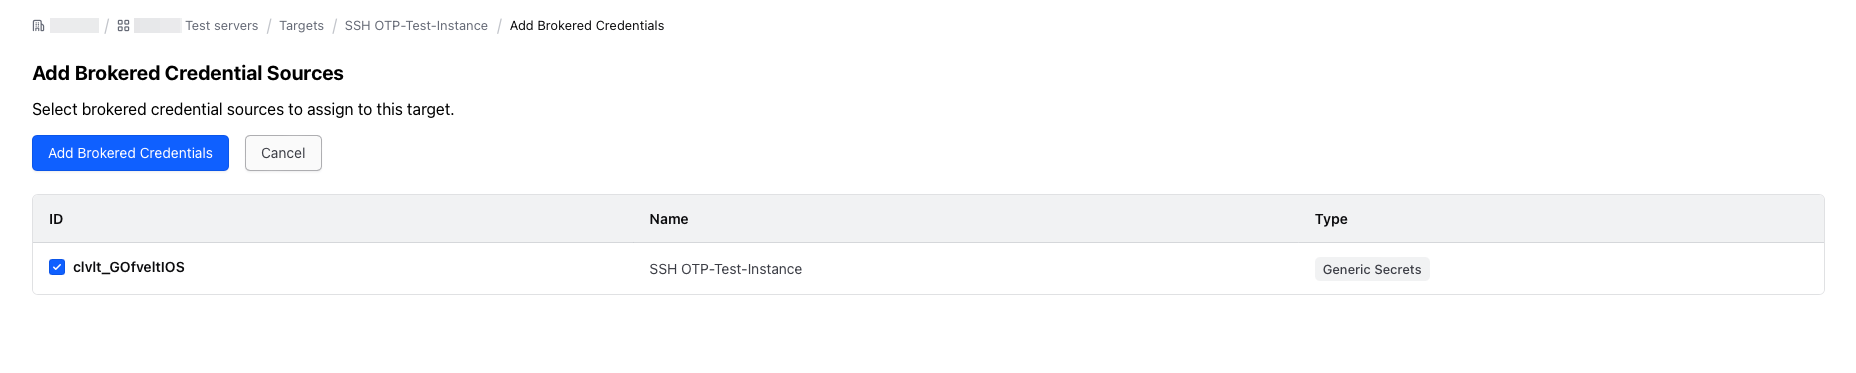
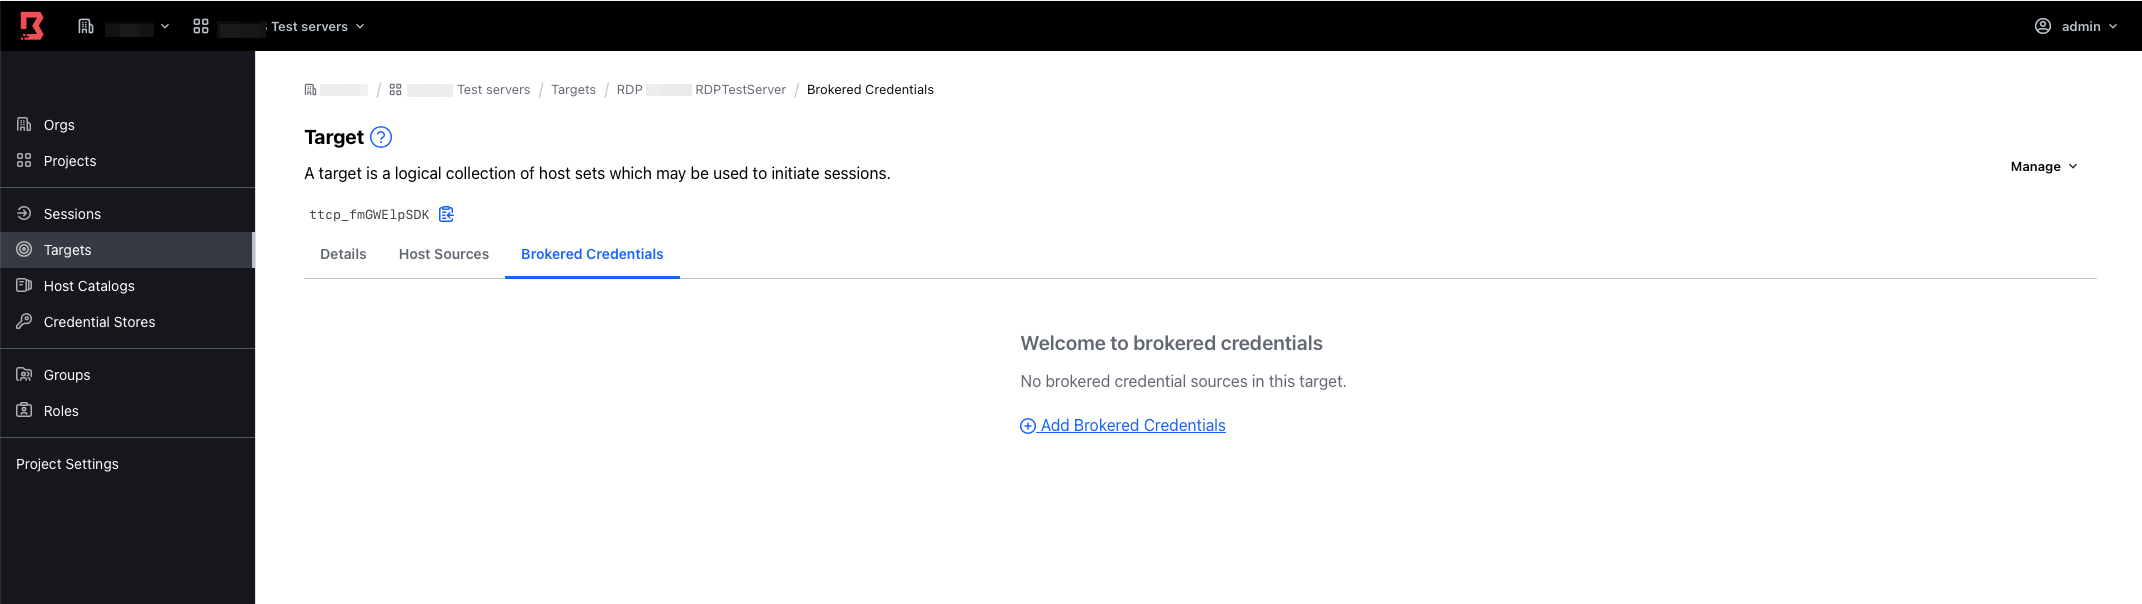
14. Then go to the Brokered Credentials section and click on Add Brokered Credentials.
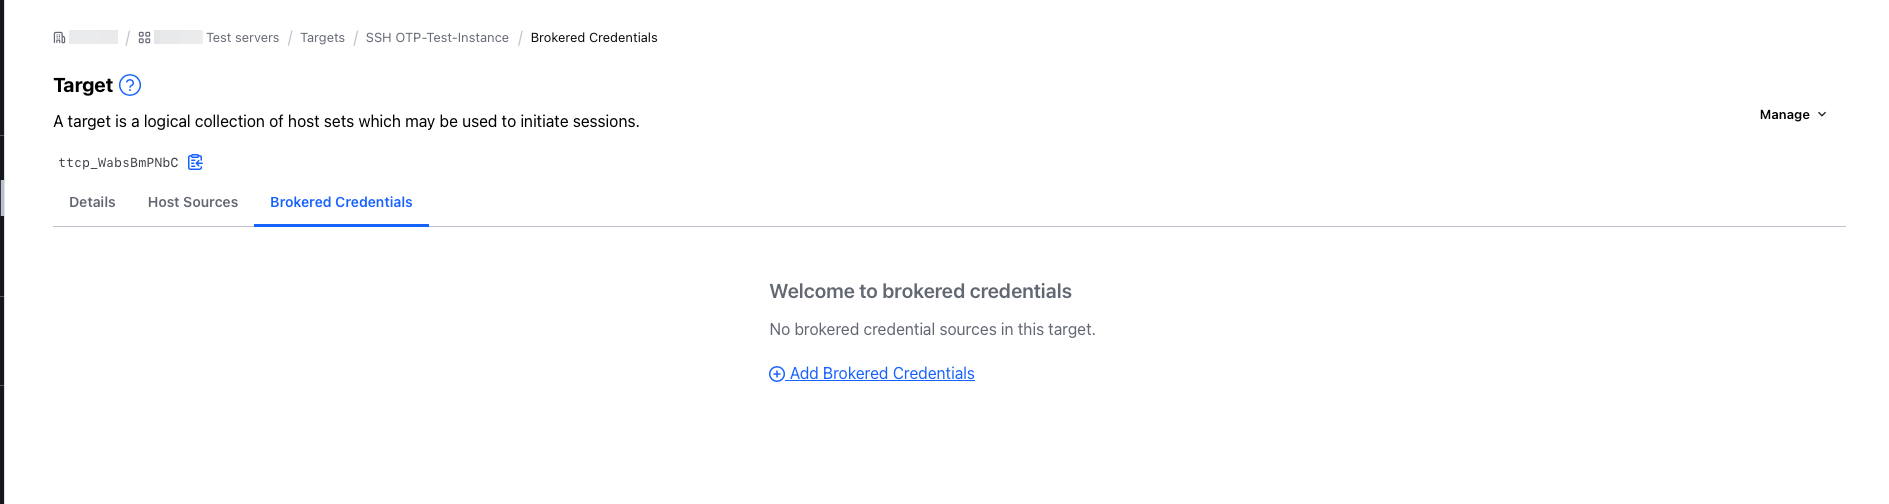
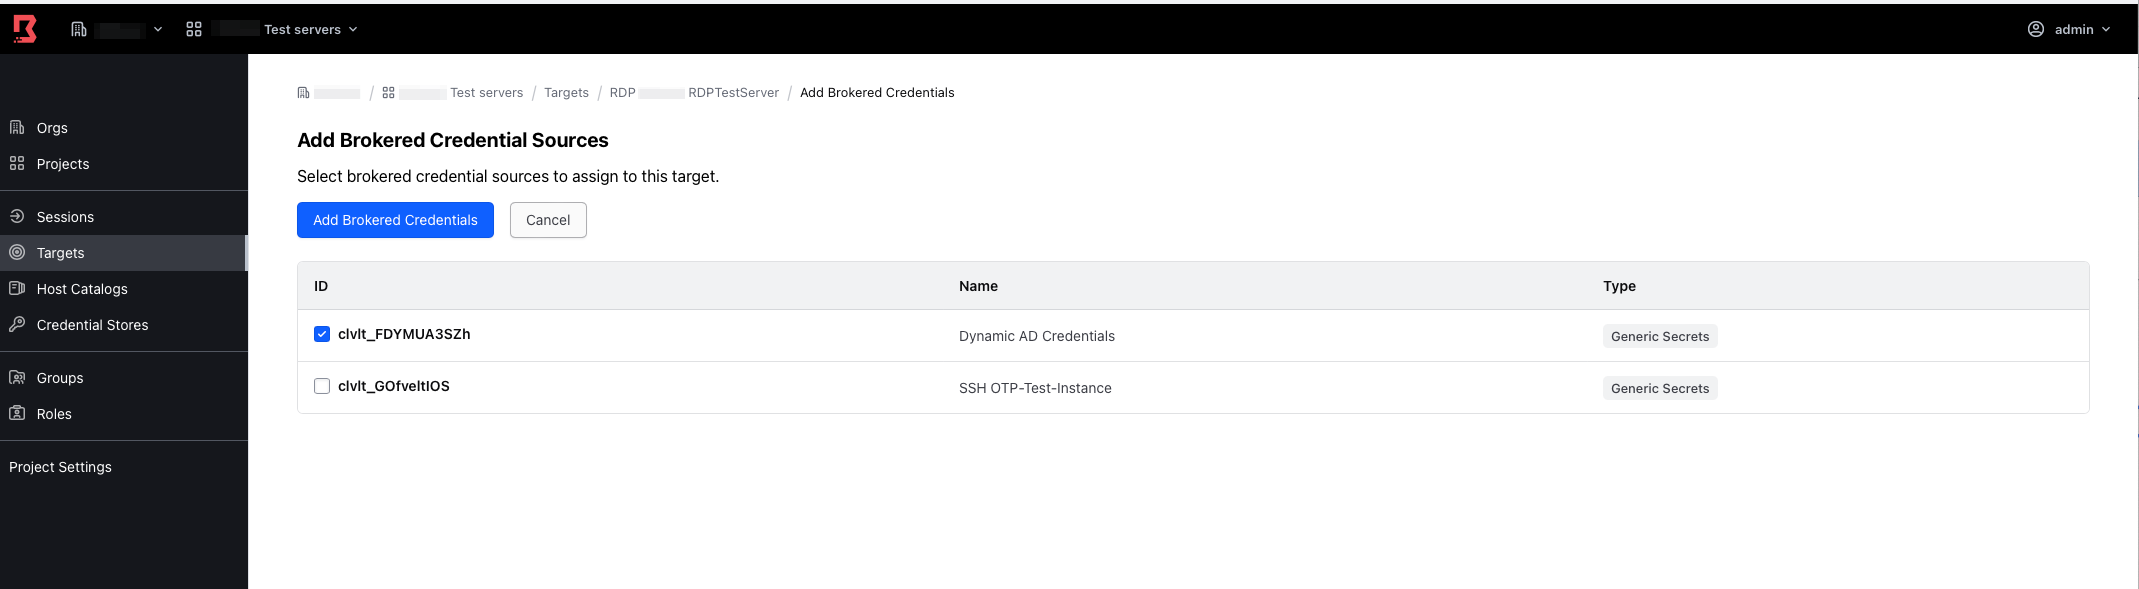
15. You should see what you created earlier. Select it and press Add Brokered Credentials.
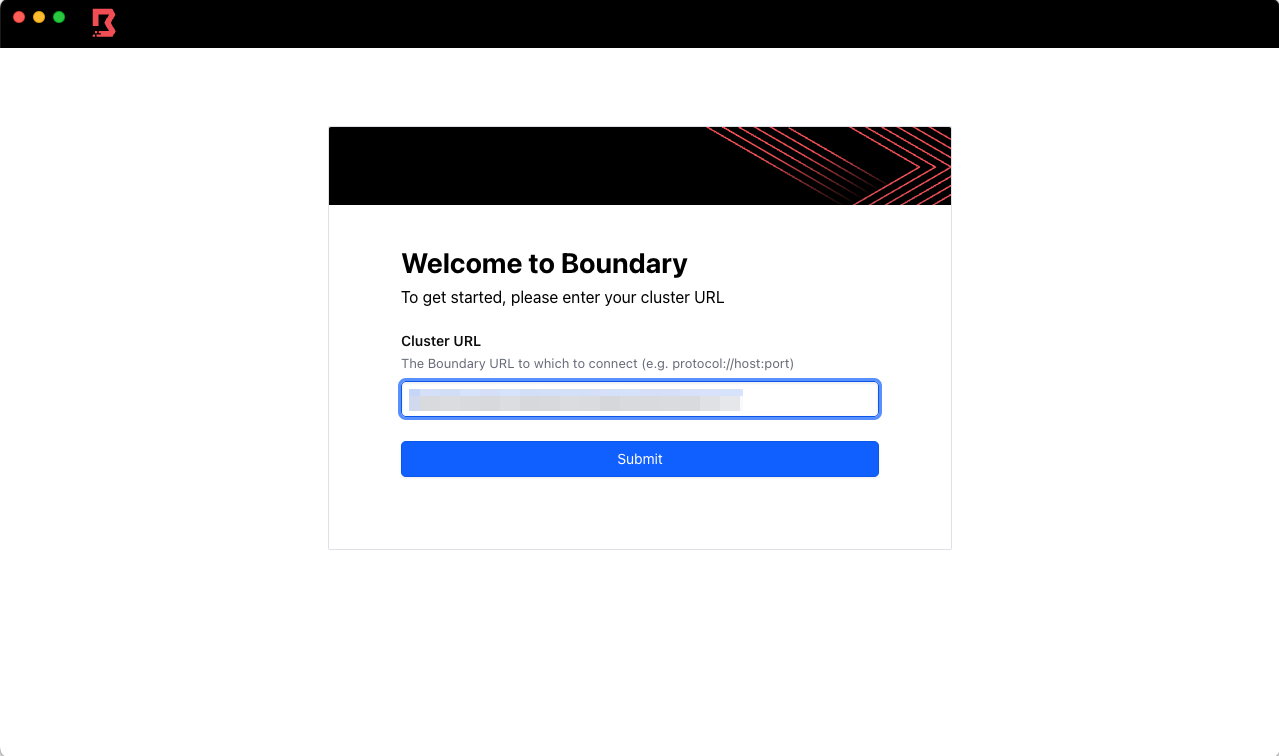
16. Now open Boundary Desktop on your workstation and enter the address of your Boundary server:
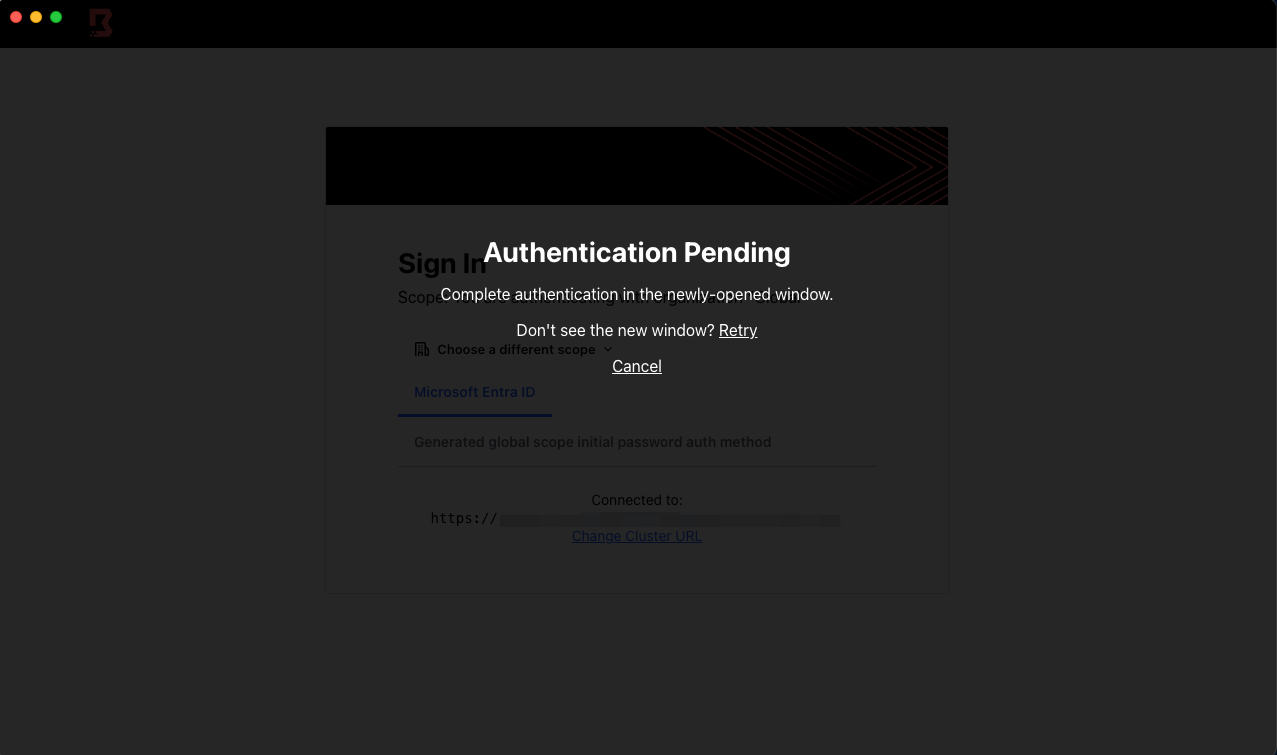
17. If you have configured your server correctly with Microsoft Entra ID, it should automatically be selected by default for authentication. Click on the Sign In button and follow the steps to authenticate with your Microsoft account. This is where 2-factor authentication comes into play. If you’ve set up Microsoft Authenticator on your cell phone, you’ll need to approve the connection before it’s functional.
18. You should then be authenticated. If you don’t see any targets, your account doesn’t have the authorization to see them.
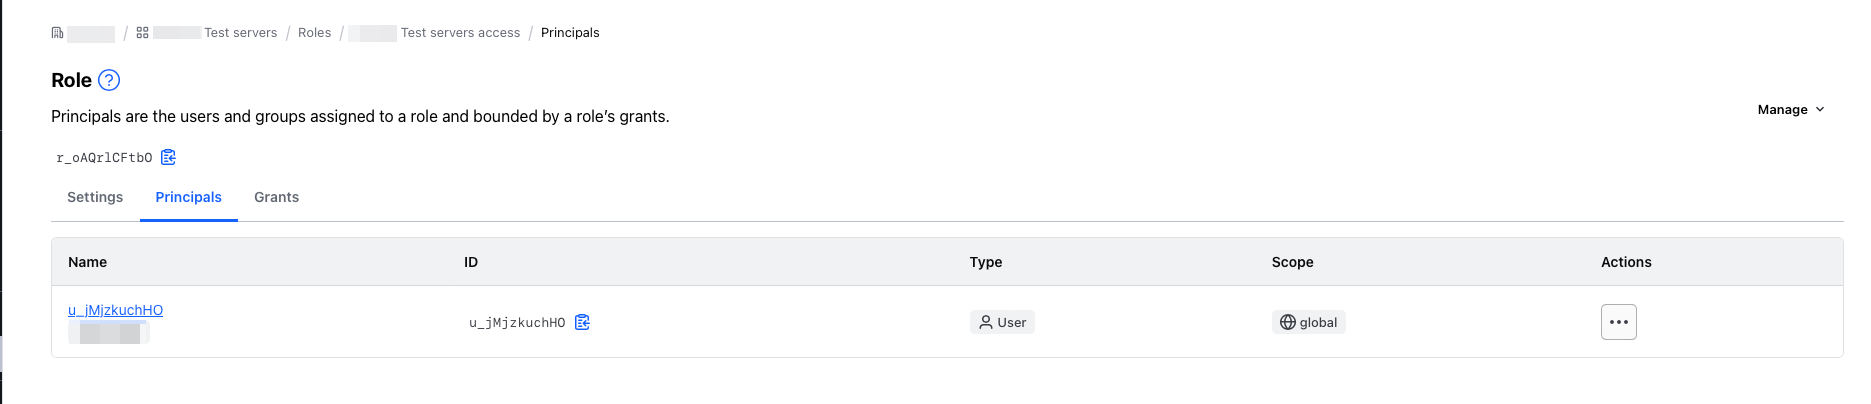
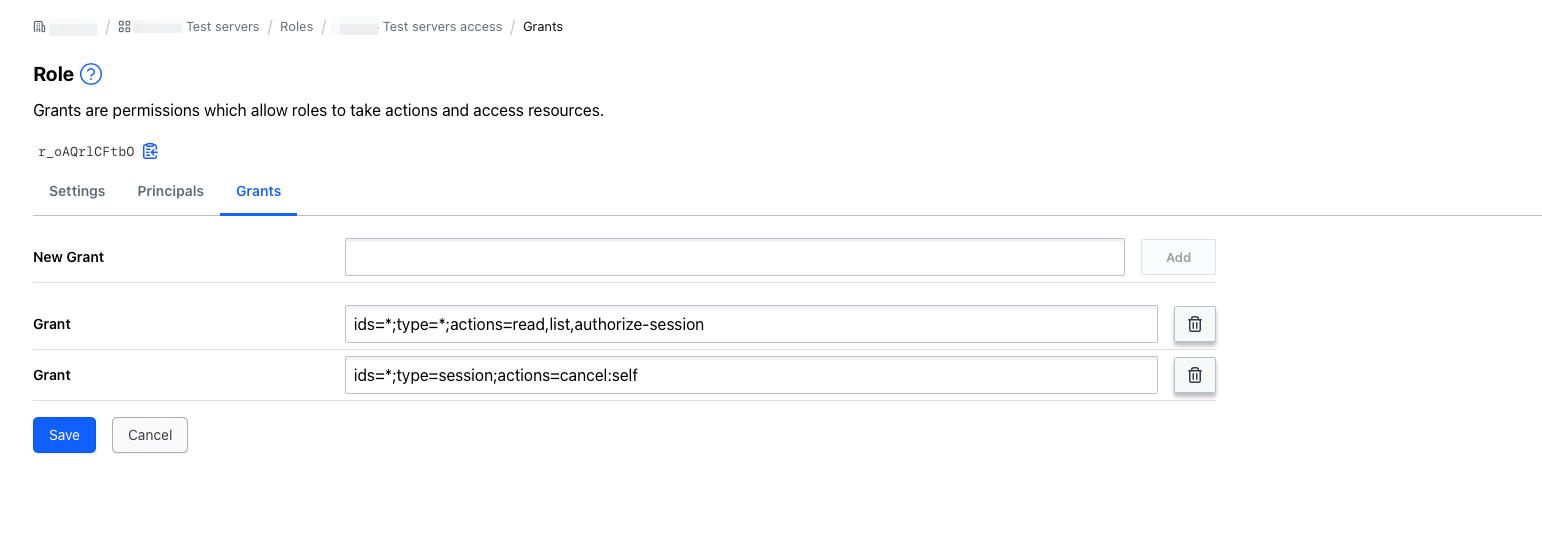
19. If this is the case, go back to your Boundary server’s web management interface with an account that has administrator rights, and make sure that your Microsoft account has rights to the project to which you’ve added the target. Create a new role, add your Microsoft account in the Principals section and add the following accesses in the Grants section:
ids=*;type=*;actions=read,list,authorize-session
ids=*;type=session;actions=cancel:self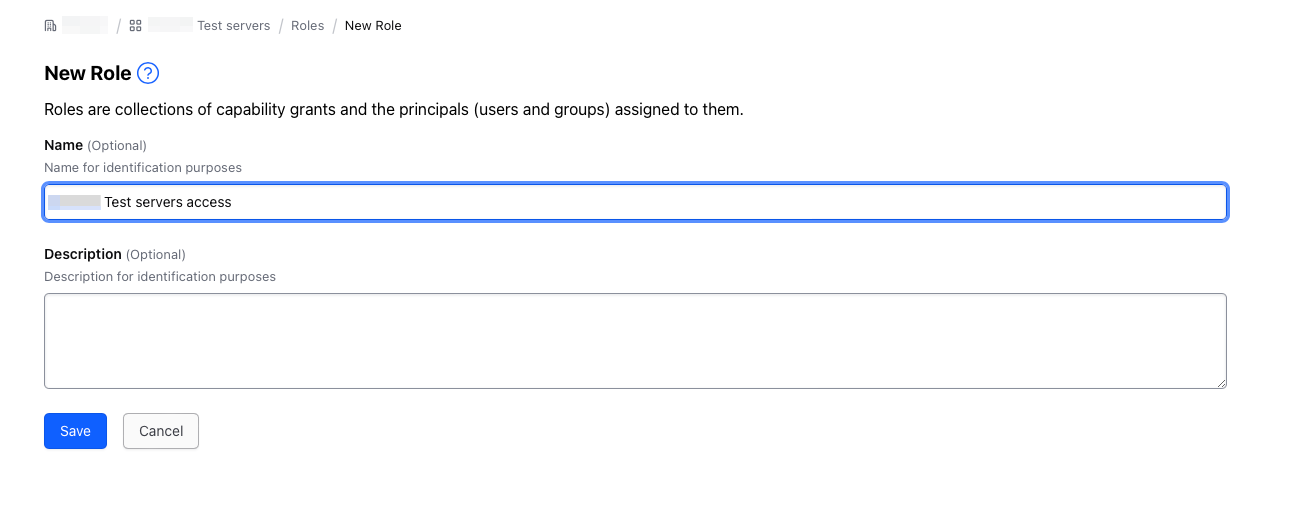
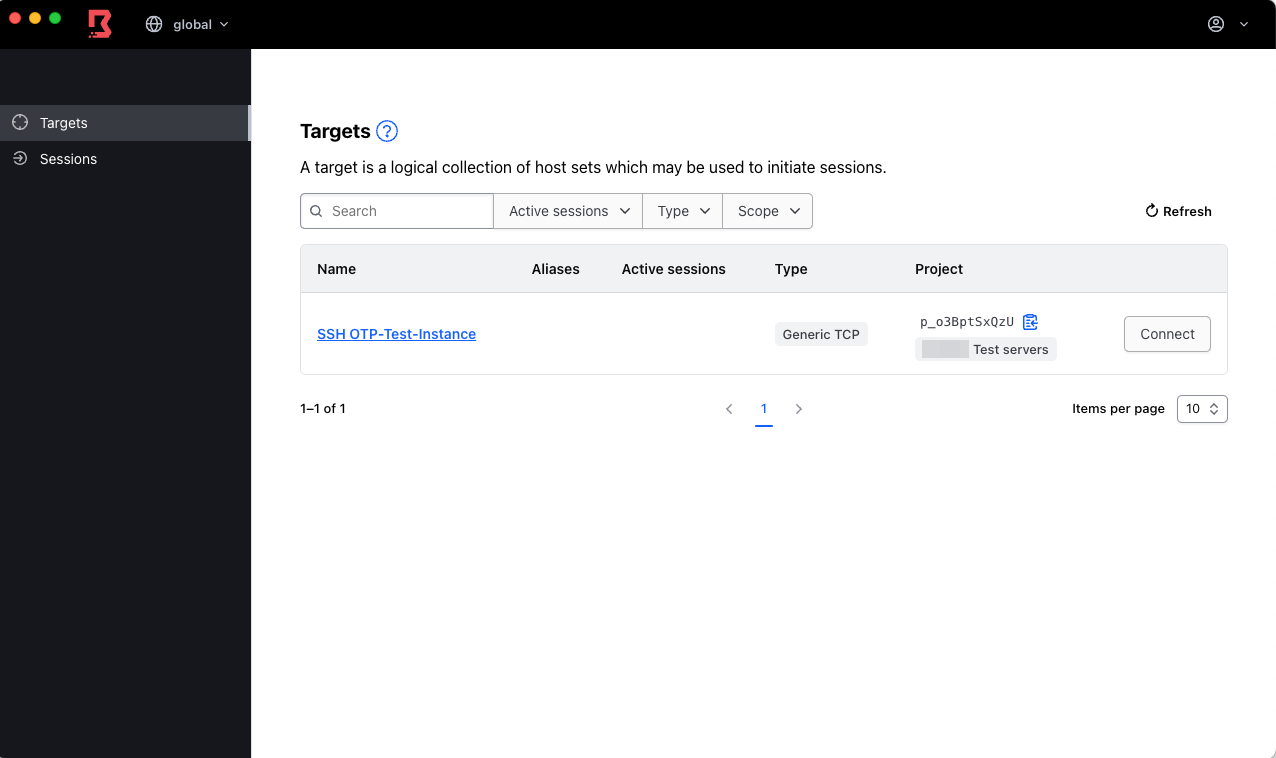
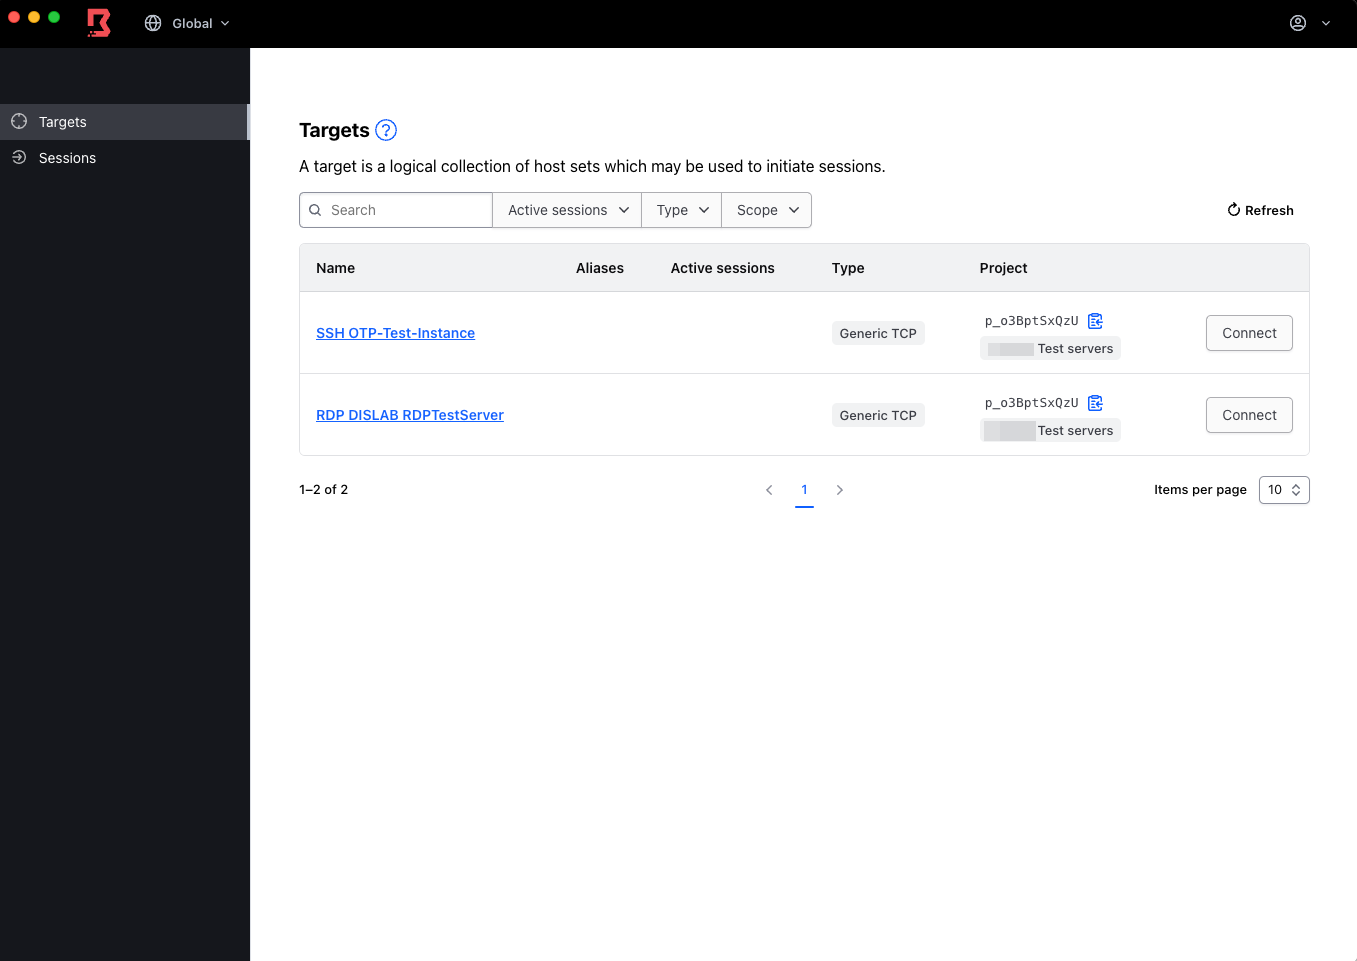
20. You should then see the target displayed in Boundary Desktop. If you don’t see it, quit and run it again.
21. Connect and you should see a window indicating the port to be used for SSH connection and the one-time password generated for you for this instance only. Note that the password displayed will work once and only for this instance. If you lose your SSH connection or log out, you’ll need to disconnect the session and create a new one in Boundary Desktop to generate a new one-time password.
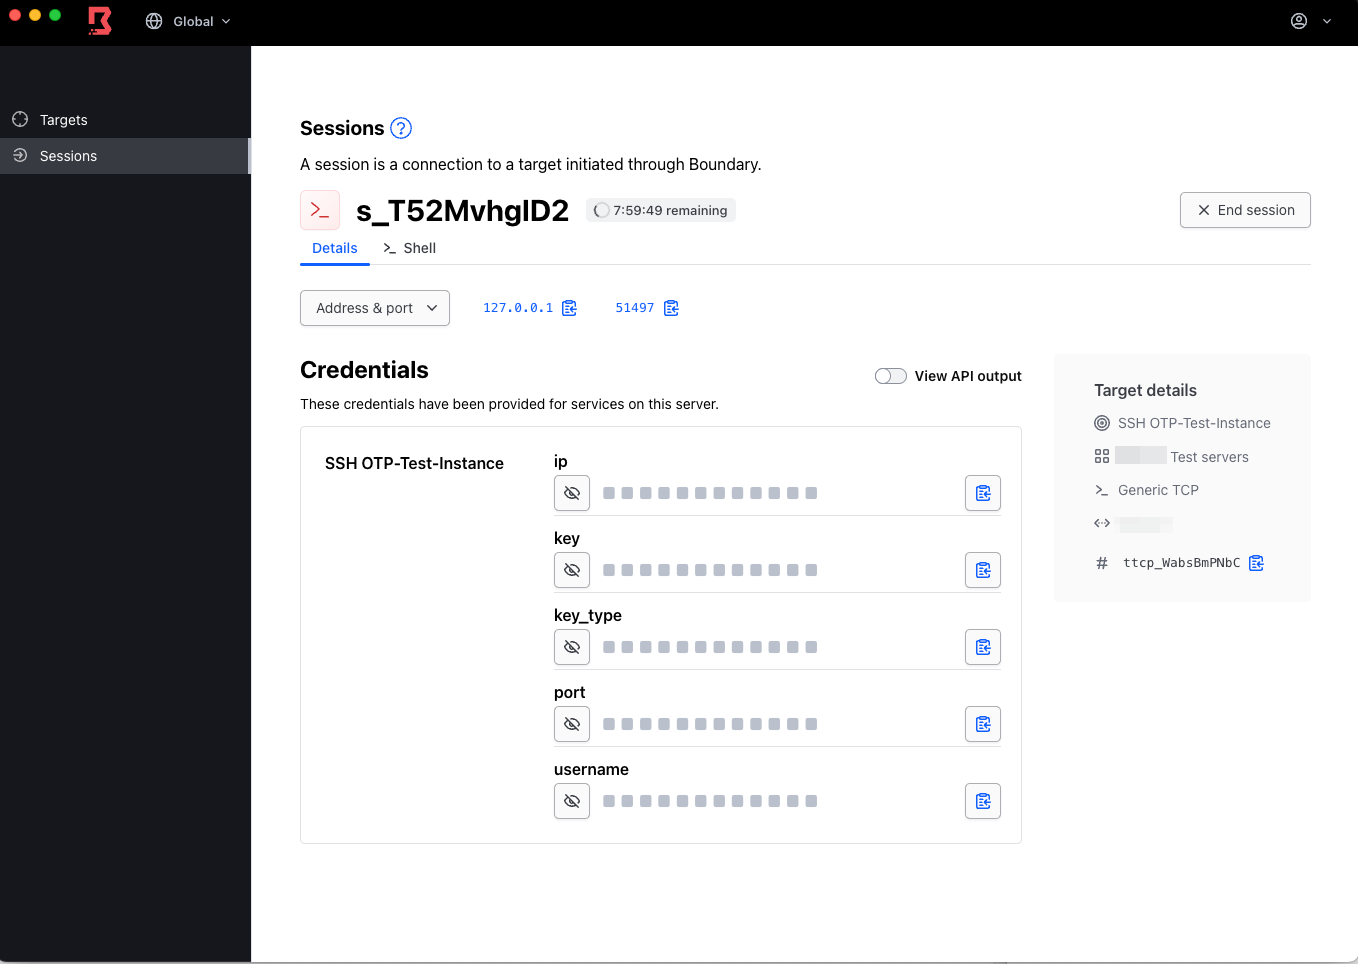
22. Open your terminal or SSH client and connect to your instance. Use the password available in the Key section of Boundary Desktop to connect to it, instead of using a PEM key.
23. If the SSH connection works with the password, your Boundary server, Vault server, and instance are able to communicate with each other. If the SSH connection is refused, make sure your worker is able to connect to your instance and that you have selected the correct worker when configuring the target in your Boundary server.
24. Remember: if you close your SSH session and try to open it again, the one-time password will be refused, so you’ll need to end your session by pressing the End Session button in Boundary Desktop and connect a new session to obtain a new one-time password to connect to this instance.
Using Vault Dynamic Credentials with Boundary Desktop
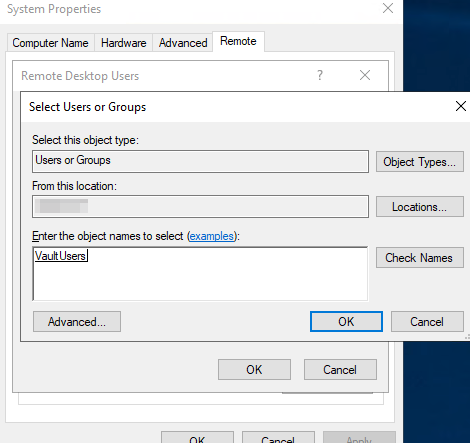
1. First, make sure that the instance you want to connect to allows access to the VaultUsers group via RDP.
2. Connect to your Boundary server via the web interface and authenticate with an account that has administrator rights.
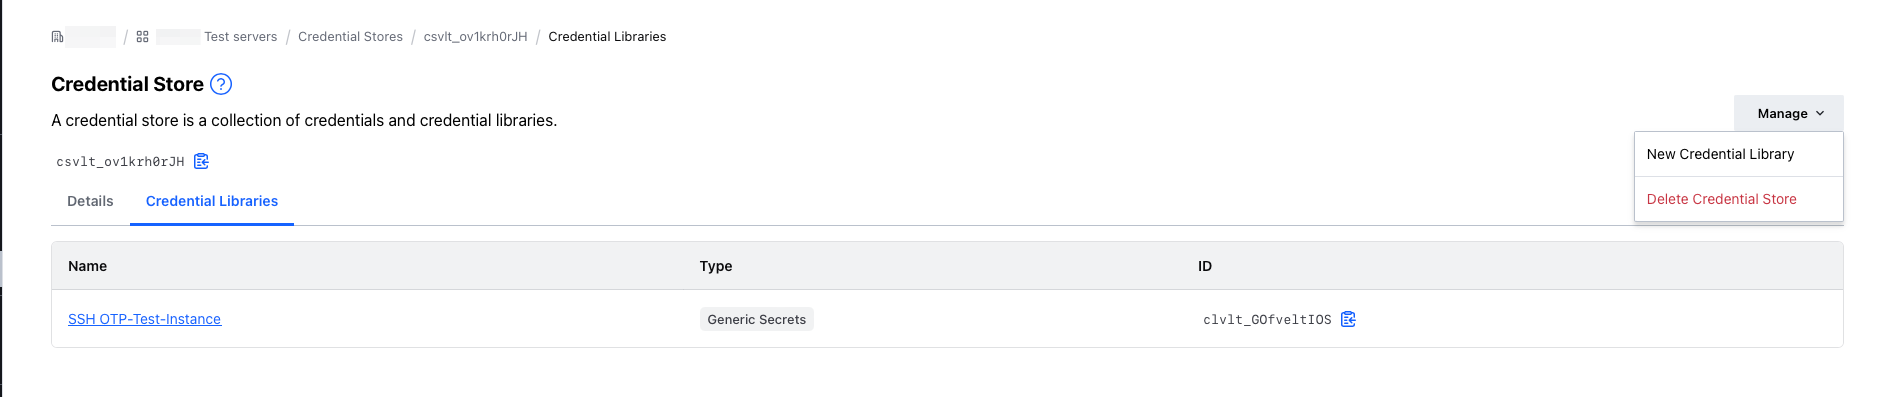
3. Select your organization, your project, and go to the “Credential Stores” section, which should already have a Vault library.
4. Click on your Vault library and go to the “Credential Libraries” section.
5. Click Manage and select New Credential Library.
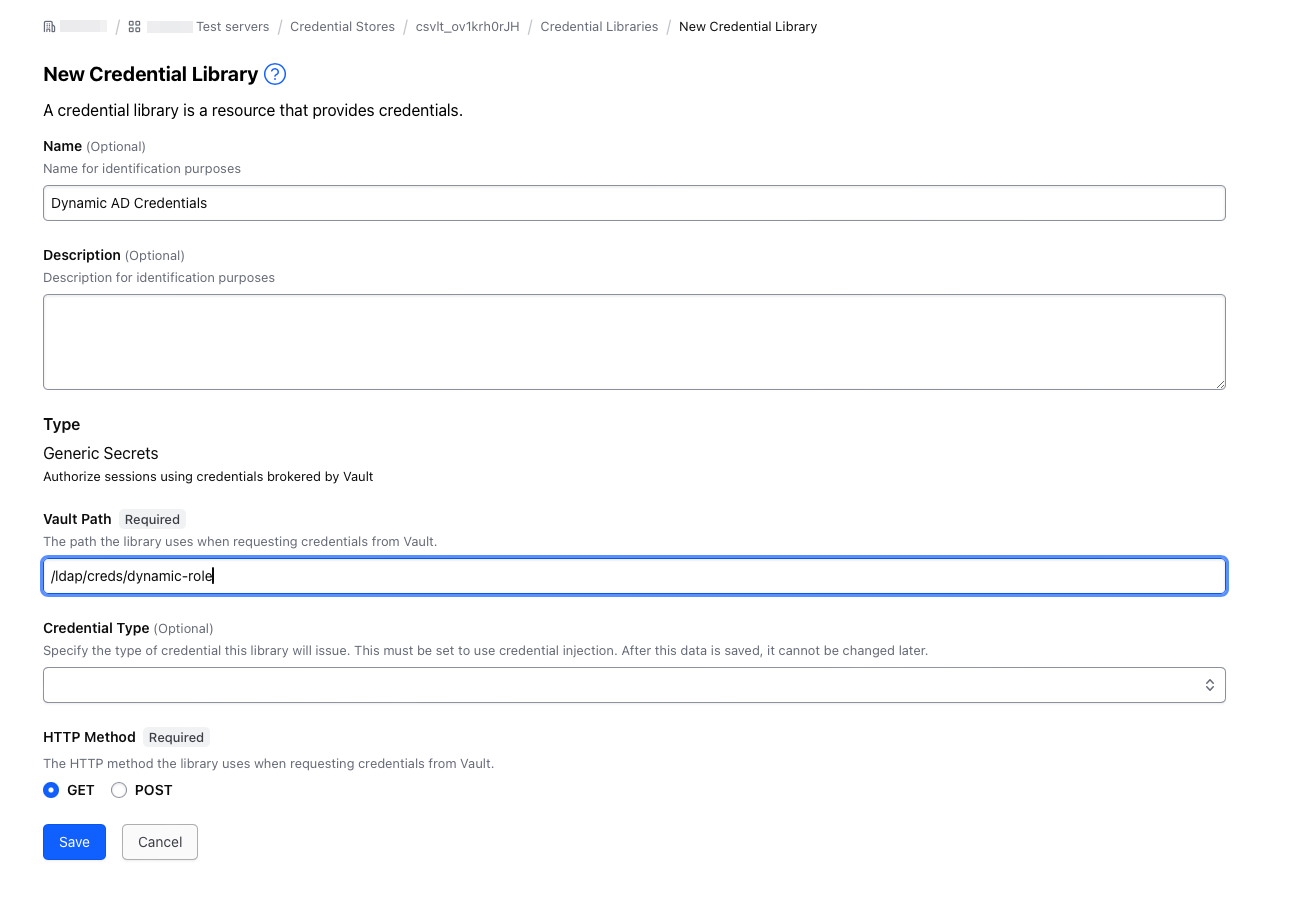
6. Enter a name such as Dynamic AD Credentials.
7. In the Vault path section, enter the following path:
/ldap/creds/dynamic-role8. Leave the HTTP Method section at Get and click Save. You should obtain something similar to this:
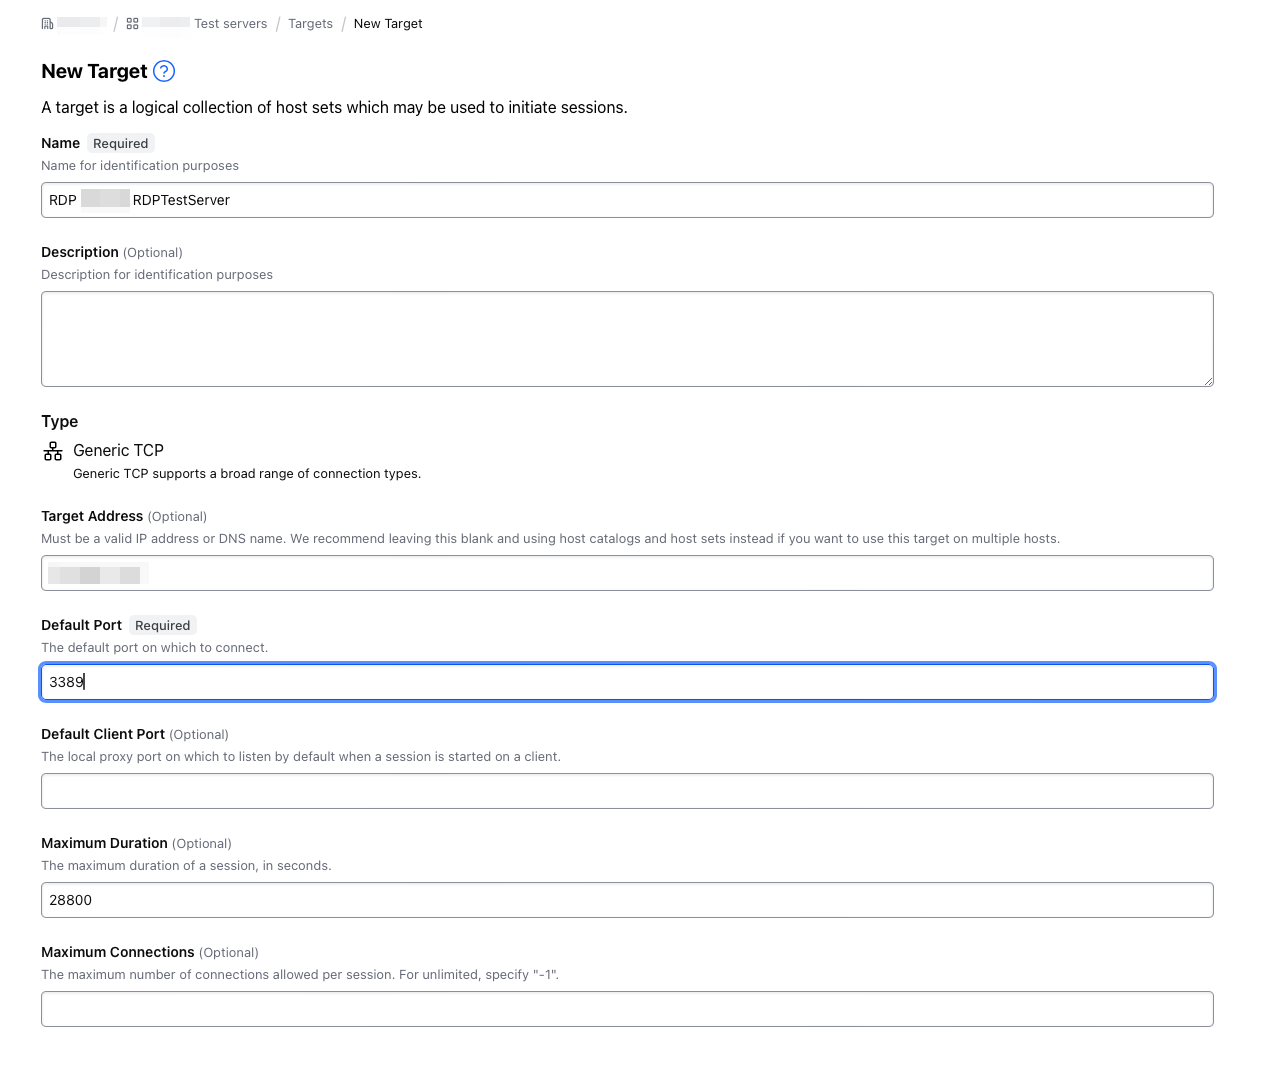
9. Go to the Targets section and click on New Target. Enter a name, the IPv4 address of your Windows 2019 virtual machine and port 3389.
10. If you have several workers connected to your Boundary server, activate the Egress worker filter section and enter information related to the tags you have defined in your workers configuration file. In this case, as my virtual machine is on the internal network side of the company’s head office, I’ll specify this in the Filter section, but if your instance was elsewhere, or if you had several workers in different AWS regions, you could use another type of tag.
"mainoffice" in "/tags/type"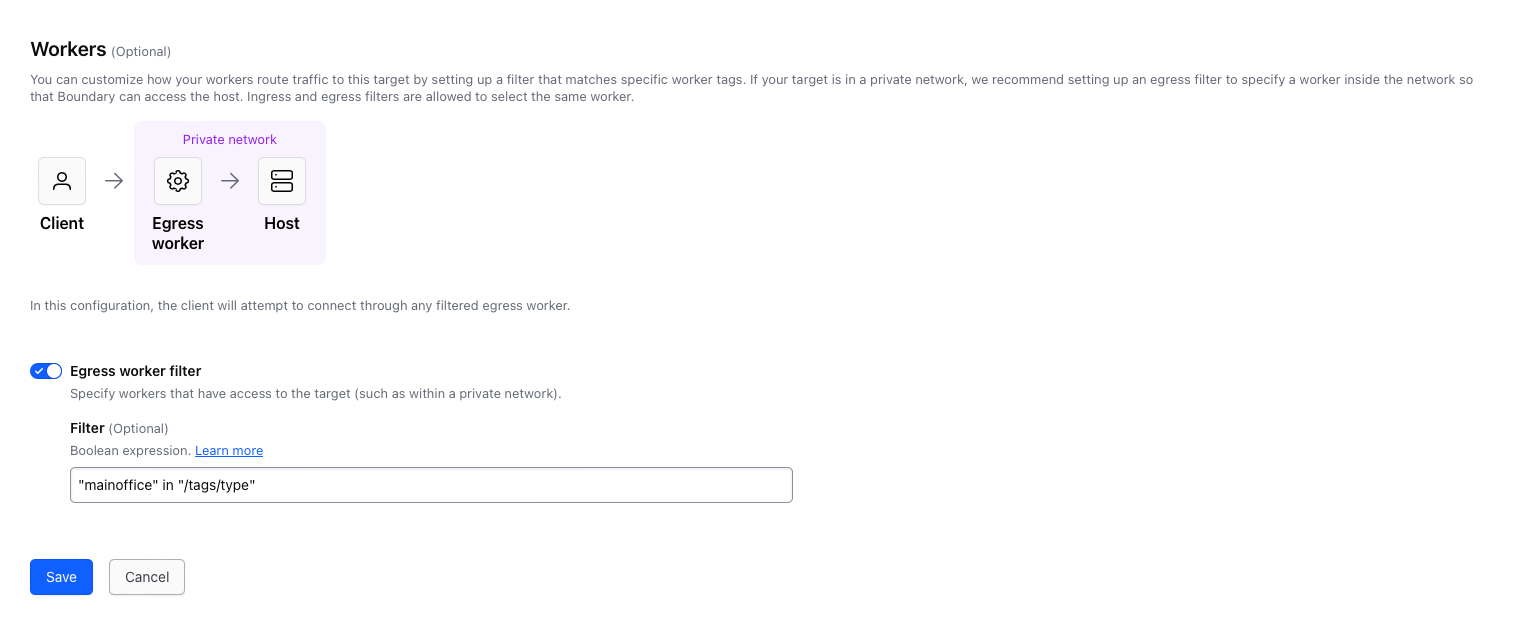
11. Save your target and go to the Brokered Credentials section.
12. Press the Add Brokered Credentials button, select Dynamic AD Credentials and press Add Brokered Credentials
13. Now open Boundary Desktop on your workstation and authenticate with your Microsoft account, or press the Refresh button if it’s already open. You should see your second target in the list.
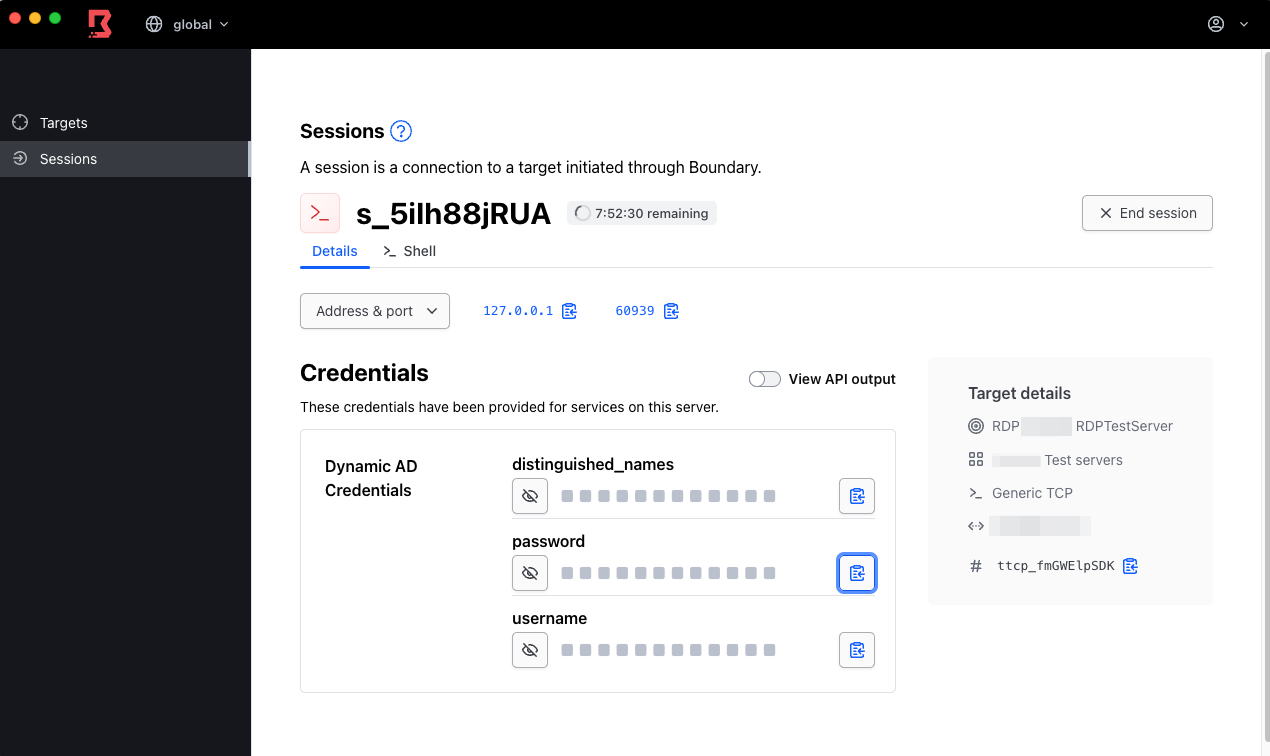
14. Press the Connect button, and if the connection to your worker is working properly, you should see your account information displayed, as well as the local port to be used for the RDP connection:
15. All that remains now is to use a software program to test the RDP connection on your workstation. Here we’ll be using Microsoft Remote Desktop, available free of charge from the Apple App Store or Microsoft’s Windows Store. Remote Desktop Connection, which comes with Windows or any other software that allows RDP connections, will also work.
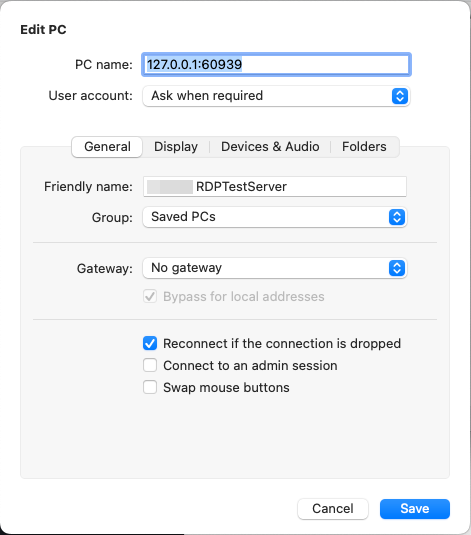
16. Launch the connection and you should get a window asking you to enter your account details
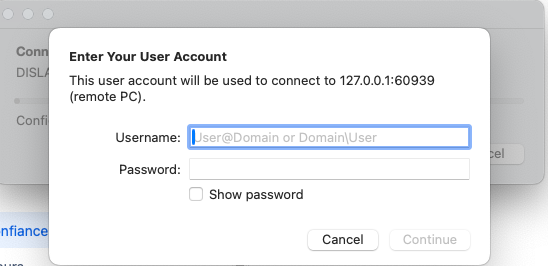
17. Retrieve the username from the username section of Boundary Desktop and the password from the password section:
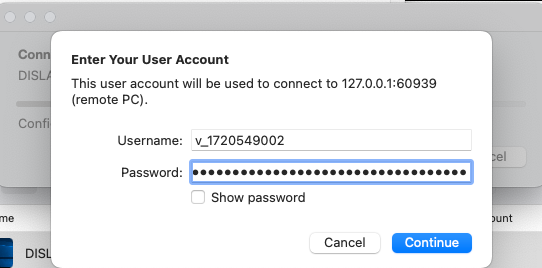
18. You should be able to connect via RDP. If you’re on a different domain, you may need to add the domain to the username in the style of YourDomain\Username or username@yourdomain for the connection to work.
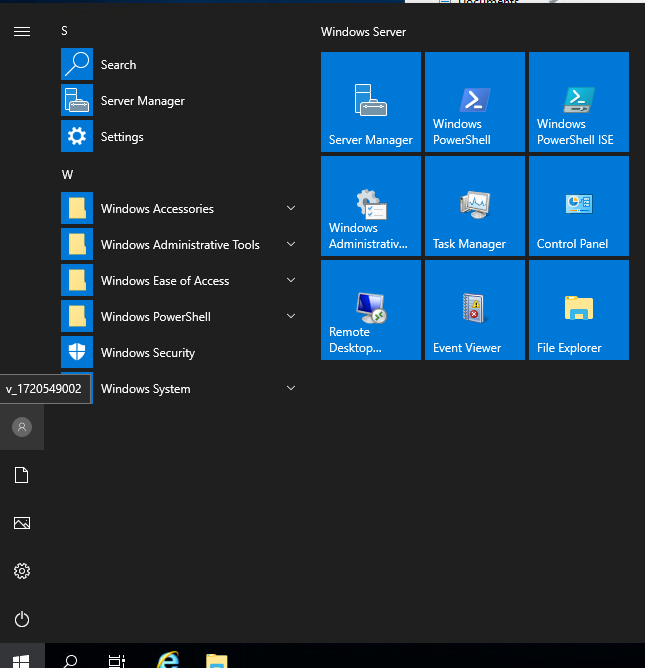
19. Please note that this account will be automatically deleted from the domain after eight hours, and a new account will be automatically created when a new session is logged into Boundary Desktop.
Conclusion
We have demonstrated that an approach combining HashiCorp Boundary, HashiCorp Vault and Microsoft Entra ID enables secure connection to two types of instances. Whether it’s a Linux or Windows instance, it’s possible to enable remote access without having to set up a VPN or having to create permanent accesses for each user.
Unlike a VPN, which gives full access to the remote network, Boundary lets you connect a single service at a time via a secure tunnel between your workstation and the remote worker. You’ll have access only to the services you need, and only for a short time. Combined with Vault, it’s also possible to use one-time accounts and passwords, so you don’t have to continually manage new accesses.
We’ve tested SSH and RDP access, but it would be possible to allow other types of access.
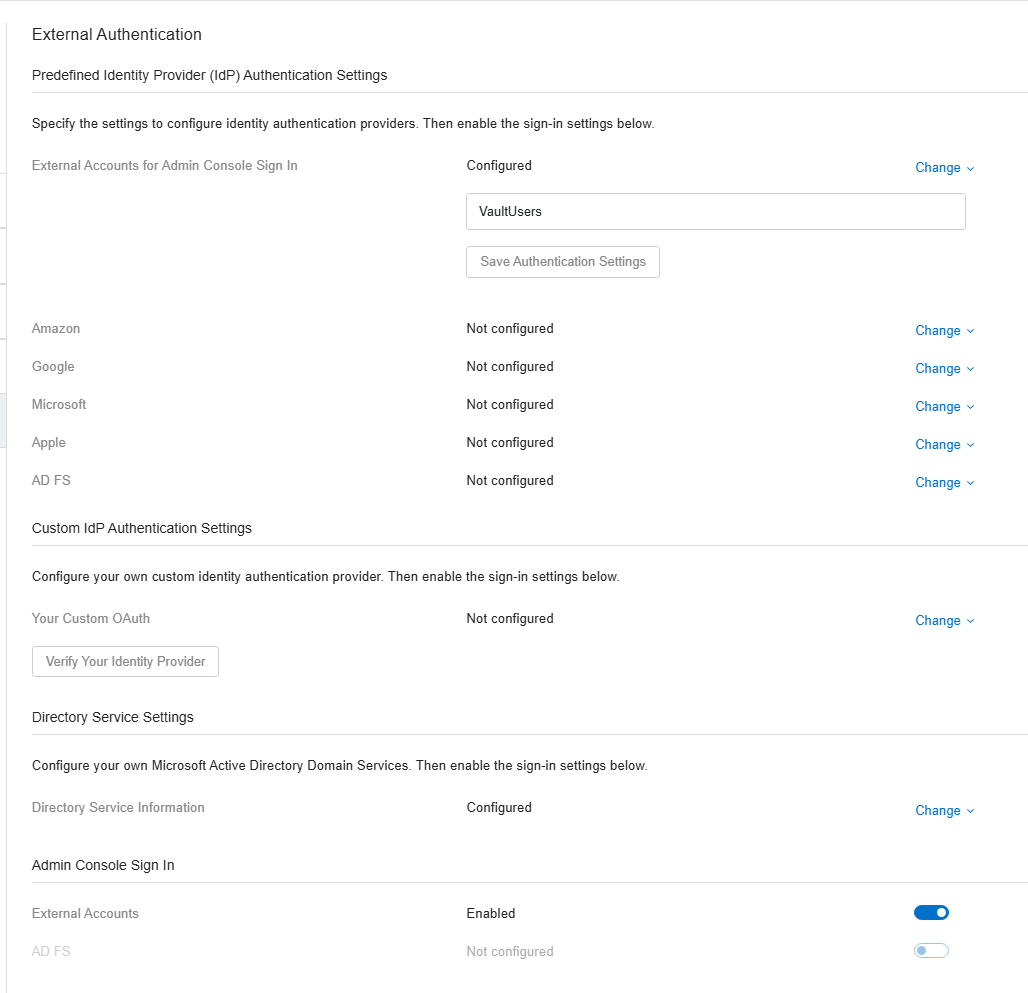
For example, if you have a FileMaker server running on Ubuntu and you wish to grant certain employees temporary access to the admin console, you could connect it to your Active Directory domain controller and allow access by configuring the “Directory Service Settings” section and adding the VaultUsers group to the “External accounts for Admin Console connection” section. All that remains is to create an HTTPS target on your Boundary server, to which you attach the Dynamic AD Credentials we’ve created here to generate a temporary account for access to the console.